

These caramels are unbelievably simple to make. Although it requires some advance planning, the steps are all very easy, and the end product easily rivals store-bought chocolates. I started with this recipe: Microwave Sea Salt Caramels, but substituted honey for the corn syrup. I cooked the caramels for 6 minutes (for a softer, less chewy caramel), and I made the molded version. Really, glance through that recipe - it's quite easy and quick. Just be sure to coat your molds with plenty of cooking spray so the caramels release easily.
I used semi-sweet chocolate for the coating, but any kind you like - white, milk, dark - is fine. After coating the caramels in chocolate, you can sprinkle the top of these with sea salt, like I did, or just some colored sugar, or leave them plain. It's really up to you.
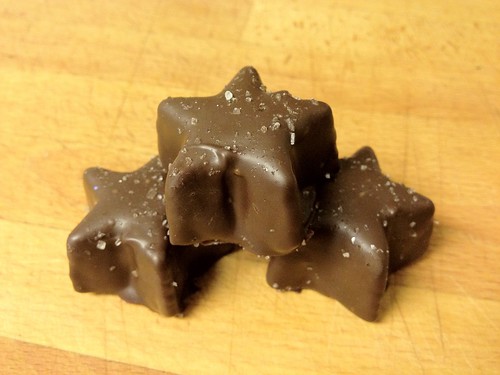
Although I made a molded version, you can certainly make the cut-shape version instead. Those will dip just as well as the molded version. Rectangles are fine, but a diamond-cut pattern would be very pretty. For my molds, I used novelty/shaped silicone ice-cube trays. One was from Target (the hearts), the other from IKEA (the stars). Each individual shape held about 2 tsp of caramel.
One note about the coating: I mixed a little canola oil in with the melted chocolate to make the finished coating shiny. The drawback to this is that the chocolate melts on your fingers even faster than usual. So you can omit the oil if you want, but the chocolates might not be as shiny-looking.
Chocolate Sea Salt Caramels
Store these in the fridge, but let sit at room temperature for a few minutes before eating so the caramel is nice and soft.
Yield: about 2 dozen, depending on mold/cut size
INGREDIENTS:
1 recipe Microwave Sea Salt Caramels, cooked soft (6 minutes), and molded or not, cooled
1 1/2- 2 cups chocolate chips (white, milk, semi-sweet, or dark - your choice)
1 tbsp canola oil
Sea salt and/or sprinkles, to decorate
DIRECTIONS
1. Prepare the caramels according to the recipe directions. Once cooled, cut or remove from molds, and arrange on a parchment or foil (sprayed with cooking spray) lined baking sheet.
2. Place baking sheet in the freezer, and freeze at least an hour or overnight. (You need the caramels to get pretty hard so they won't dent or deform when you're dipping them in melted chocolate.)
3. When the caramels are done freezing, combine chocolate chips and oil in a glass measuring cup or wide-mouth mason jar. Microwave for 1 minute, stir well, and continue microwaving in 30 second increments until the chocolate is fully melted. Use caution, the chocolate and measuring cup will be hot. Once the chocolate is prepared, remove the baking sheet with the caramels from the freezer.
4. Working with a spoon, or (if you're comfortable) chopsticks, dip each caramel in the chocolate. The chocolate should be deep enough that you can submerge the candy to coat it fully. Gently shake off excess, then wipe the bottom on the edge of the cup so there is a medium-thin layer of chocolate on the caramel. Every 3 or so candies, pause to sprinkle with desired decorations (before the chocolate coating dries).
5. When finished dipping and decorating, return the caramels to the fridge to allow the chocolate coating to fully set. You can trim any excess chocolate from around the edges once they're totally cooled and set. Store the caramels in an air-tight container in the refrigerator.
See? Pretty easy. And guaranteed to impress!
Like what you read? Subscribe to the feed in your favorite feed reader, or follow me on Twitter to keep up with new posts!
Please tell me they taste just as delicious as they look! Because they look absolutely amazing!
ReplyDeleteWhat a great idea using the honey instead of corn syrup. Do the nuances of honey flavor permeate the carmel?
This recipe is absolutely amazing! I love everything salty, and my chocolate and caramel too! I would definitely love to try to make them)))))) yummy!
ReplyDeleteYou can definitely taste the honey in the finished caramels, and it's super yummy with the chocolate and sea salt. They taste really good!!
ReplyDelete