Showing posts with label dinner. Show all posts

Monday, June 11, 2012

Meatless Mondays: Light Soba Noodles


Soba noodles have been a real favorite around here recently.  When I’m not in the mood for a dish as substantial as soba noodles with peanut sauce and shrimp, I like something lighter.  This fresh-flavored dish uses veggies to bulk up the whole-grain soba noodles, so you get a satisfying serving size while keeping your caloric intake reasonable.

This dish takes less than 20 minutes to put together (maybe 15, depending on how fast your water boils!).  It's vegan.  If you would like, you can pan-fry or broil some tofu for extra protein. Or, if it's not a meatless Monday in your house, shrimp might be really nice too.

Light Soba Noodles with Veggies
You can customize the veggies in this dish however you like – snow peas would be delicious here.  
Yield: 2 servings

INGREDIENTS
3 oz soba noodles
1 bell pepper, stem and seeds removed, thinly sliced
1 cup shitake mushrooms, sliced
1 green onion, sliced
¼ cup cilantro, chopped
1 lemon, zest and juice
1 tbsp toasted sesame oil
1 tbsp light soy sauce
Sesame seeds

DIRECTIONS
1. Cook soba noodles according to package directions. (If your directions are in Japanese, and you don't read Japanese, it probably says to boil them for 6 minutes.)
2. While noodles cook, heat a skillet over medium heat. Spray with cooking spray, and add peppers and mushrooms.  Cook, stirring occasionally, until mushrooms are cooked and peppers are tender-crisp.
3. Combine lemon zest, juice, sesame oil, and soy sauce in a small bowl and whisk to combine.
4. When the soba noodles are finished cooking, drain and place in a medium mixing bowl. Add the cooked vegetables, green onion and cilantro, and dressing. Toss to combine. Portion into two bowls, and serve sprinkled with sesame seeds. 

I didn't have any leftovers to test my theory on, but I think this would be delicious as cold leftovers too.  If you try it, let me know!  

 Like what you read? Subscribe to the feed in your favorite feed reader, or follow me on Twitter to keep up with new posts! And don't forget to like me on Facebook!

Wednesday, June 6, 2012

Six Sisters Honey Sesame Chicken

 Although I love coming up with my own recipes, I also cook thing from other blogs and cookbooks on a regular basis.  Now, I'm very guilty of rarely following those recipes to a tee - I make changes and substitutions based on preference and experience. Usually that works in my favor (although it backfires occasionally too!).

This recipe from Six Sisters Stuff looked too good to pass up on - and so simple to make! After perusing the comments and considering our own tastes, I made a few changes that are noted below. Overall, this recipe gets two forks up, and I know we'll be making it again.

I made the following changes to the ingredients:
- The recipe called for 4 chicken breasts (no weight given) - I used 1.5 lbs chicken tenders. Tenders worked really well, but in the future I would use 2 lbs or slightly more chicken.
- used light soy sauce instead of regular
- substituted tomato paste for ketchup
- reduced oil from 2 tbsp to 1 tbsp, and used toasted sesame oil instead of vegetable oil
- added 1 tbsp fresh grated ginger root
- omitted red pepper flakes
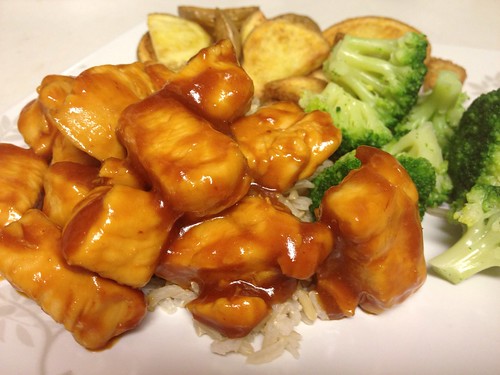
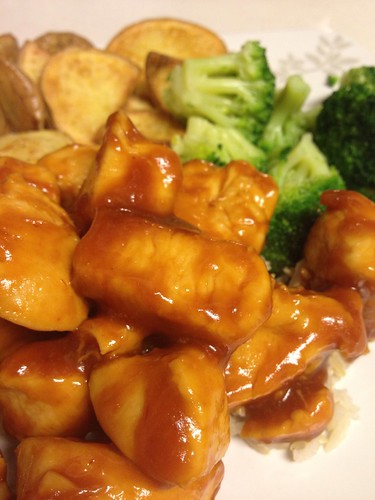
- topped with green onions and sesame seeds, served over brown rice

The directions worked well, with one exception.  I cooked the chicken on low for about 3 hours, which was perfect. After adding the corn starch, my crockpot would not get hot enough to thicken the mixture. This might be the fault of my machine - perhaps more powerful models could do this - but I had to transfer everything to a pot on the stove, over medium heat, until it thickened.  Not a big deal, but an issue to be aware of, so you don't stand around all day waiting for it to thicken. It needs to simmer to thicken, which was more than my machine could manage without a lot of time to catch up.
 This recipe makes plenty of sauce with the chicken, which we like a lot. There was enough sauce to stir in some steamed broccoli along with the rice, which is just how I like my sesame chicken!

I'm sorry I haven't been around in a while - I got a new job and have been quite busy with that. My goal now is to post a few new things a week - I've got some great things that I want to share with you! 

Like what you read? Subscribe to the feed in your favorite feed reader, or follow me on Twitter to keep up with new posts! And don't forget to like me on Facebook!! 

Tuesday, February 21, 2012

Orange Bourbon Street-Inspired Chicken

Orange bourbon chicken2

I always enjoyed the bourbon chicken from the cajun restaurant in the mall I used to live near. Maybe it was the macaroni and cheese side dish, the sweet sauce on the chicken, or the delicious red beans and rice, but the pizza place next door rarely tempted me away from the bourbon chicken.

Lately, I've developed a love for Trader Joe's frozen orange chicken dish - it's as good as take-out, but less expensive. However, the battered and fried chicken pieces aren't doing me any nutritional favors. So when I ran across this bourbon chicken recipe, I thought I might modify it a bit to satisfy both a bourbon chicken and an orange chicken craving.

The resulting sauce has the fantastic tang of orange chicken, the sweetness of both dishes, and a richness all its own. I added cornstarch to make the sauce really thick, but if you like a thinner sauce feel free to omit it.  We enjoyed this over rice with steamed broccoli and oven-roasted crispy potatoes (which I seem to be making at least once a week!).

Orange bourbon chicken

Orange Bourbon Street-Inspired Chicken
This recipe is my take on a bourbon chicken recipe. The sauce is sweet and tangy, and does not contain any bourbon. Feel free to add some crushed red pepper flakes or a pinch of cayenne pepper to this dish to make it spicy.
Yield: 4 servings

INGREDIENTS

2 pounds boneless, skinless chicken breasts, cut into bite-size pieces
1 tablespoon olive oil
1 garlic clove, minced
1/4 teaspoon ginger
1/4 cup fresh-squeezed orange juice
Zest of one orange
1/4 cup light brown sugar
2 tablespoons tomato paste
1 tablespoon white wine vinegar
1/2 cup water
1/4 cup light soy sauce
1 tablespoon cornstarch
To serve: hot brown rice

DIRECTIONS
1. Combine all ingredients except chicken and olive oil in a bowl and stir until sugar is dissolved.
2. Preheat a large skillet over medium-high heat. Add the oil, then the chicken pieces and cook until lightly browned.
3. Add the sauce to the skillet and bring to a boil. Reduce heat to medium/medium-low and simmer 15-20 minutes. You want the sauce to be coating the chicken pieces, rather than having the chicken swimming in the sauce.
4. Serve over hot rice. 

Like what you read? Subscribe to the feed in your favorite feed reader, or follow me on Twitter to keep up with new posts!

Friday, February 3, 2012

Roasted Tri-Color Potatoes

Tricolor potatoes2

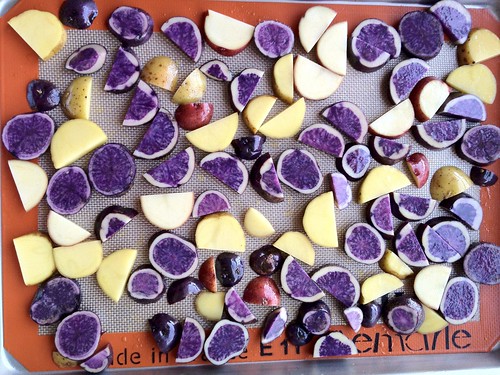
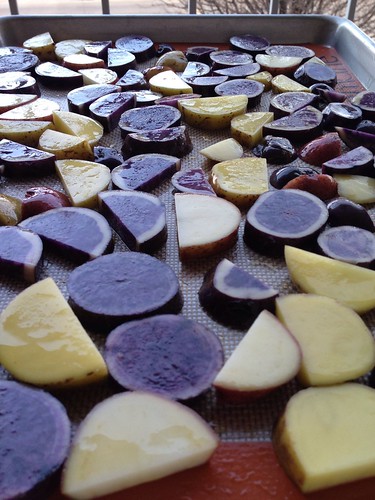
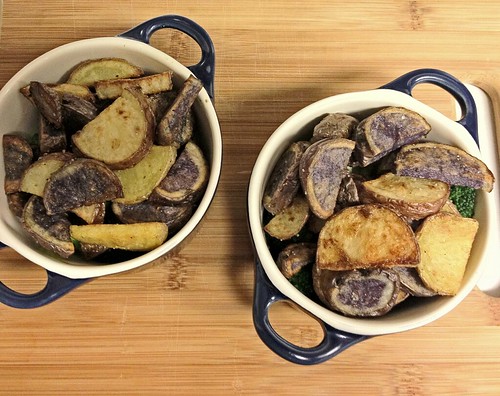
This is a riff on a Joy of Cooking recipe for oven french "fries".  We picked up a bag of pretty tri-colored potatoes at Trader Joe's last week, and I've been trying to come up with something fun to showcase their colors. I intentionally picked a bag with mostly purple potatoes...big surprise! (Purple is my favorite color.)

Tricolor potatoes1

I was craving roasted potatoes, and this recipe makes perfectly roasted, browned potatoes - totally satisfying. I call for 2 tbsp of oil, because that is the amount the original recipe used, but I probably could have used only one tablespoon.

roastedtricolorpotatoes1

You could certainly make this recipe using red-skinned potatoes, small yellow potatoes, or whatever other kind of potato you like.

roastedtricolorpotatoes2

Roasted Tri-Color Potatoes
Yield: probably 4 servings as a side (but we demolished these, so 2 servings as dinner)

INGREDIENTS
About 1 lb potatoes
2 tbsp olive oil
Salt and pepper to taste

DIRECTIONS
1. Preheat oven to 450 degrees.
2. Wash the potatoes. Slice into 1/2 inch thick slices, and soak in a bowl of cold water for 10 minutes.
3. Drain the potatoes, and pat them dry on paper towels.  Toss with the oil, and arrange on a baking sheet. (I used a silpat liner, but I don't think that it was necessary.)
4. Bake for 30-40 minutes, stirring/flipping two or three times while they bake. They should be beautifully golden brown and crispy when they are done.
5. Season to taste with salt and pepper.
roastedtricolorpotatoes3

We ate these over some steamed broccoli, topped with shredded cheddar cheese. I will definitely be making potatoes this way again!

Like what you read? Subscribe to the feed in your favorite feed reader, or follow me on Twitter to keep up with new posts!

Monday, January 30, 2012

Pumpkin Gnocchi

pumpkingnocchi2


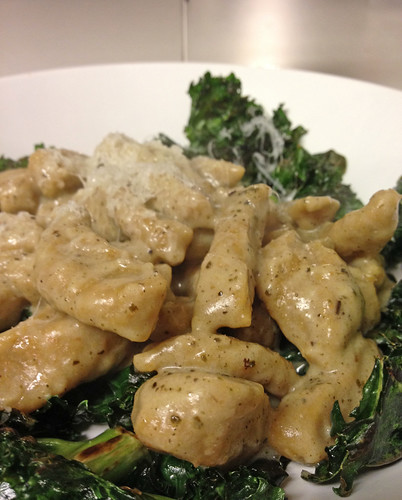
Today marks the first post in my Meatless Mondays series - vegetarian meals that you can prepare on a weeknight. Gnocchi probably aren't the first thing that come to mind when you think of simple, weeknight meals - more likely, they conjure images of an Italian grandmother slaving all day in the kitchen. But really, they can be quite simple to make, especially if you think a bit outside the traditional.

These gnocchi are made with canned pumpkin, so there is no cooking, mashing, or cooling prior to starting to make the dough. You could make them with basically any mashed root vegetable or squash, as long as you let the mashed veggie cool before you start the dough (otherwise, it will cook the egg).  I'd like to try a sweet potato and parsnip version sometime soon.

Once you have the gnocchi made, you can serve them several ways. Pictured is how we ate them, with a sage cream sauce (recipe below). You could also just toss them with a bit of melted butter and parmesan. Or brown them in a pan with a bit of olive oil.

You can always only make a half batch of gnocchi, if you only need to serve 2 and don't want leftovers. I plan to brown the leftovers with some kale for lunch.  But this recipe makes 4 servings, because that uses up the whole can of pumpkin, which I find convenient.

Pumpkin Gnocchi
For a more traditional shape, you can roll each gnocchi over the tines of a fork before boiling if you like. 
Yield: 4 servings

INGREDIENTS
1 14.5 oz can pumpkin puree
1 egg
1 tsp salt
2-2 1/2 cups whole wheat flour

DIRECTIONS
1. Set a large pot of water on to boil. Salt the water.
2. Combine pumpkin, egg, and 1 cup of flour in a bowl. Stir until combined. Stir in the second cup of flour. Add the last 1/2 cup of flour if needed. The dough should be soft, but not overly tacky.
3. Working with 1/4 of the dough at a time, flour a work surface, and roll the dough out into a snake shape. You can decide how thick or what size you would like the gnocchi to be. Using a sharp knife, cut the gnocchi to your desired size. (I rolled out the dough to about 1 inch diameter, then cut every 1/2 inch or so. I didn't roll them over a fork, like I mention above, because that is time consuming.)
4. Place the cut gnocchi into the boiling water using a slotted spoon, and cook until they float, about 2-3 minutes. While you boil the first 1/4, roll and cut the next portion. Remove the cooked gnocchi with a slotted spoon.

To brown the gnocchi, heat some oil or butter in a skillet over medium heat, and transfer the cooked gnocchi directly to the skillet. Or remove them to the sauce below.

pumpkingnocchi1

Sage Cream Sauce
Made without any actual cream, this sauce works beautifully on pumpkin gnocchi. 
Yield: 2 servings

INGREDIENTS
1 tbsp butter
2 tsp dried rubbed sage

1 shallot, minced
1/2 cup white wine (or vegetable broth)
3/4 cup unsweetened almond milk (or any milk except skim)

1. Melt the butter in a skillet over medium heat. Add sage and shallot, and cook about 30 seconds. Stir in wine or broth and milk, and bring to a boil.
2. Add cooked gnocchi to the sauce, and cook for a few minutes until the sauce thickens. Serve, sprinkled with parmesan cheese.

We ate this over crispy kale. To make crispy kale, combine 2-3 cup chopped or torn kale leaves in a skillet with about 1 tbsp olive oil over medium high heat. Cook about 5 minutes, until crispy. (Source)

This meal should come together in around 30 minutes - not bad at all for a weeknight!


Like what you read? Subscribe to the feed in your favorite feed reader, or follow me on Twitter to keep up with new posts!


Thursday, January 12, 2012

Potato and Chicken Curry

This is a sort of odds-and-ends recipe, that can - and should - be customized based on what you have in your fridge. Starting with a basic coconut curry broth, with onion, ginger, and garlic, I make this with whatever veggies and protein we have on hand. The potatoes cook up very tender, and take on a lot of the curry flavor, so I highly recommend including some of those. But feel free to use broccoli, cauliflower, beans, tofu, or whatever else you have to round out the dish. You can also toss a handful of chopped fresh herbs on top when serving.  If you don't use the potatoes, you can skip most of the simmering time, and this dish will be ready to eat in only a few minutes.

It is freezing cold here right now, and yesterday we had extremely high winds.  A hearty and comforting dish like this is just what we needed for a blustery winter day.


Potato curry 2
 
Potato and Chicken Curry
Feel free to substitute any veggies you like in this dish - it is a very flexible recipe. 
Yield: serves 4

INGREDIENTS
1 tbsp olive oil
1 medium onion, chopped
2 carrots, peeled and chopped
1 green bell pepper, seeds and stem removed, chopped
2 cloves garlic, minced
1-2 inch piece fresh ginger root, minced
1 medium russet potato, washed and chopped into bite-size chunks
1/2 tsp cumin
1 1/2 tsp curry powder
1 cup vegetable or chicken broth
1 can light coconut milk
2 chicken breasts, chopped into bite size pieces
Optional: cayenne pepper, to taste
To serve: cooked brown rice

DIRECTIONS
1. Heat a 3 quart or larger pan over medium heat. Add onion, carrot, bell pepper, and ginger and cook until onion is translucent. Add garlic and potato, and cook 1 minute more. Add spices, and cook 1 minute more, stirring.
2. Add broth and stir well, scraping any brown bits off the bottom of the pot. Bring to a boil, then reduce heat to medium and simmer for 10 minutes. Stir in coconut milk and simmer 10-15 minutes longer, until potatoes are nearly done.
3. Stir in chicken, and cook about 5 minutes more, until chicken is cooked through.
4. Serve over rice. Enjoy!

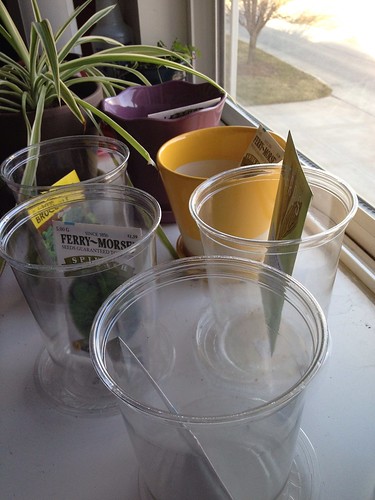
Garden update: The sprouts are still looking great, and the swiss chard has started to poke up out of the dirt.  I'm hoping to taste a few broccoli sprouts today!

Thursday, January 5, 2012

Curried Peanut Soup and Quick Naan

We had a great holiday, filled with family time and lots of food! Now that the new year has started, it's back to a more normal routine. The new year also means a re-commitment to healthy habits for a lot of people, or at least a recovery from some serious indulging. For me, that means meals filled with veggies - and soup is a great way to pack the nutrition in.

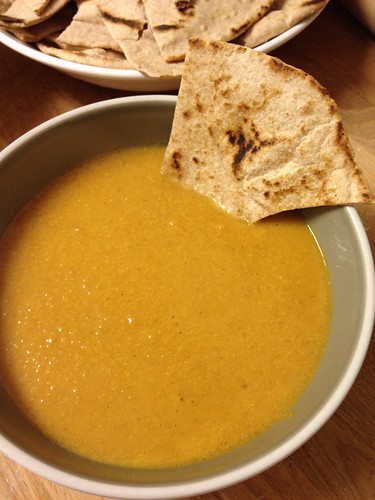
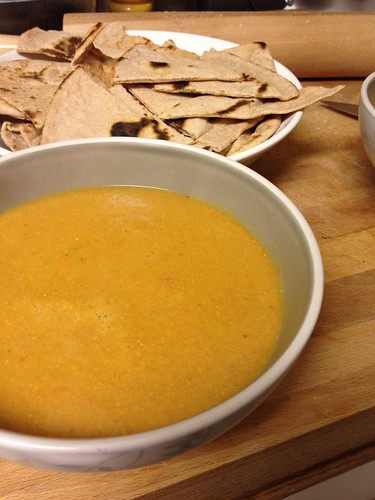
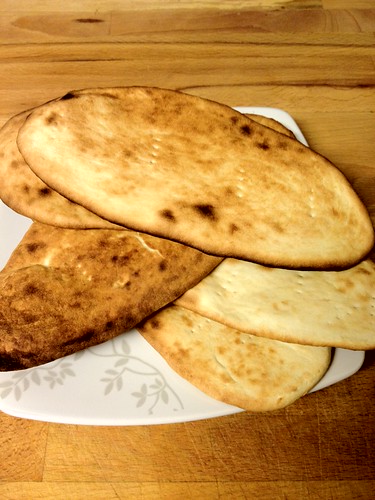
This soup recipe has long been one of my favorites; it's spicy and nutty and slightly sweet - very satisfying! It comes together, start to finish, in thirty minutes or less.  I've included a quick whole-grain naan recipe that you can make in just a few minutes, because soup always needs bread for dunking.

Curried Peanut Soup 3

Curried Peanut Soup
This recipe uses chickpeas to extend the flavor of the peanut butter, giving lots of taste without tons of calories. Adjust the spiciness to your preference - I make it pretty mild.
Yield: 4 servings, about 2 cups each.

INGREDIENTS
1 tsp sesame oil
2 onions, chopped
1 tbsp grated fresh ginger root
1 1/2 tsp curry powder
1/2 tsp cumin
1 14 1/2 oz can diced tomatoes, NOT drained
3 cups veggie broth, divided
1 14 1/2 oz can chickpeas, drained and rinsed (about 1 1/2 cups cooked)
3 tbsp natural peanut butter
1/8 tsp cayenne pepper, or to taste

DIRECTIONS
1. Heat a 3 quart or larger pot over medium heat. Add the sesame oil, onion, and ginger, and sautee for about 5 minutes. Let the onion start to brown a little bit - this will bring out its natural sweetness. Stir occassionally.
2. In a blender, combine the chickpeas, peanut butter, and about 1/2 cup of broth. Blend until smooth, adding however much broth is needed to blend.
3. Add the curry powder and cumin to the onion mix, and cook stirring for 1-2 minutes.
4. Add the tomatoes, remaining broth, and chickpea puree to the pot. Increase the heat to bring to a boil. Reduce heat and simmer about 5 minutes. Stir in cayenne pepper.
5. Remove the soup from the heat and let cool slightly. Using an immersion blender, or working carefully in batches, blend the soup until it is smooth. Serve with bread for dunking.

Curried Peanut Soup 1

Quick Whole Grain Naan
Although this recipe isn't traditional, relying on baking powder rather than yeast to give the naan its characteristic bubbles, it produces a soft and tasty bread in only a few minutes. 
Yield: 4 large naan

INGREDIENTS
1 cup whole-grain spelt flour, or white whole wheat flour
1/2 tsp baking powder
1/2 tsp honey
pinch salt
1/2 cup water

DIRECTIONS
1. Preheat a skillet over medium high heat.
2. Combine all ingredients in a bowl, stir until the dough comes together.  If needed, add more water a teaspoon at a time. Knead the dough until you have a smooth ball.
3. Divide the dough into 4 pieces.  On a lightly floured surface, roll out a piece of the dough to 1/8 inch thickness.
4. Spray the pan with a bit of olive oil, then add the rolled dough.  Cook for a minute or so, until bubbles form on the surface and brown spots develop on the underside. Flip, and cook for an additional minute or so. Repeat with remaining dough.
5. Slice the breads into wedges, 6 or so per bread, using a sharp knife. Enjoy!

We started our windowsill garden yesterday - more on that later!
Starting the windowsill

Friday, December 16, 2011

Simple Avocado Soup

 avocadosoup3

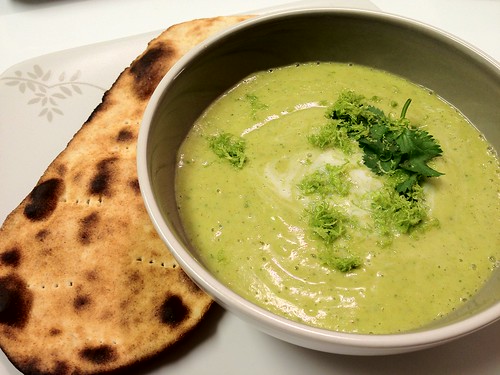
With the rush of the holiday season, cooking at home may seem out of reach. But with this simple cold soup, all you need to do is dump everything in a blender, and a few minutes later dinner is served. The soup is very filling, despite not being hot.

avocadosoupingredients2

Simple Avocado Soup
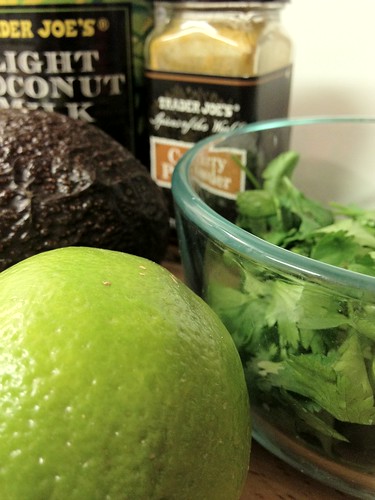
We made this curried, but try substituting lemon for the lime, basil for the cilantro, and a clove of garlic for the curry powder for a lighter flavor. The curry powder we used has a bit of heat to it; if yours is completely mild, you might want to add a pinch (or more) of cayenne.
Serves 2-3.

INGREDIENTS
1 avocado, pit removed and scooped from skin
1 lime, zested and juiced
1 handful cilantro
1 tbsp curry powder
1 cup light coconut milk
1 cup veggie broth
Salt to taste

DIRECTIONS
1. Combine all ingredients except lime zest in a blender. Blend for a minute or two, until the soup is smooth. Taste, and add salt as needed.
2. If you have time, stick it in the fridge for a few minutes to get colder.
3. Serve, topped with lime zest (and a little more cilantro if you like) and with bread for dunking on the side.

avocadosoup2

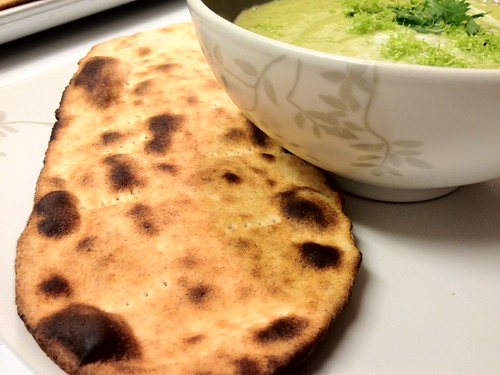
We ate this with a failed attempt at naan - the bread tasted great, but the texture was totally wrong - naan should be soft, with crisp spots where the bubbles darken, and these were crispy all over. I'm still trying to find a simple naan recipe that works.

naan2

Friday, December 9, 2011

Homemade Pizza

One of the items Nick was most excited for on our wedding registry was our pizza stone. I'll admit I was more excited for other things, but I've since become a convert. For me, pizza was always a take-it-or-leave-it food. Blasphemy, I know. Occasionally I would crave it - I do love cheese a lot - but I almost never ordered it, and even less often cooked it at home. Nick, however, is a normal human being who wants pizza on Saturday nights. To keep our budget under control, making pizza at home was a better option than buying frozen or take-and-bake at the grocery store, and a much cheaper option than delivery. Plus, at home, you can have all the crazy toppings you want (without skyrocketing the cost of your pizza). And there is no sacrifice in taste with homemade - this pizza could stand up to any delivery pie.

Using the pizza stone allows us to get a really good crisp crust that stands up to the piles of toppings we like to add. You can also apparently grill pizza, but that's a foray we haven't made yet.


Whole-Wheat Pizza Crust
This makes enough for two 12-14 inch crusts. I've tried several pizza dough recipes, and this is by far my favorite. The bread machine makes it fairly hands-off, and the dough was very easy to work with. The crust also stayed crisp, even when re-heated in the microwave. Adapted from The Bread Lover's Bread Machine Cookbook.

INGREDIENTS
1 1/3 cup water
1/4 cup olive oil
1 1/2 cup all purpose flour
1 cup whole wheat spelt flour
1 cup white-whole wheat flour
2 tsp active dry yeast

DIRECTIONS
1. Combine ingredients in your bread machine according to the manufacturer's instructions. Set for the dough cycle, and remove when the machine beeps at the end of the cycle.
Alternatively, combine the water (use warm water for this method) and yeast, and let stand until frothy (about 5 minutes). Combine flours in a large mixing bowl, and make a well in the middle. Add oil and yeast mixture, and stir until combined (you can just use your hands). Knead until you have a smooth, elastic ball. Place dough in a lightly oiled bowl, cover with plastic wrap, and let rise in a warm place 1-1.5 hours, until almost doubled in size.
2. Divide the dough in half, and shape each half into a disc by tucking the edges under into the middle. Set on a clean surface, and cover lightly with a clean dish towl for 30 minutes, until slightly puffed.
3. Preheat oven and pizza stone to 450 degrees.
4. Roll out one dough round out until about 1/4 inch thick. Sprinkle your pizza stone with cornmeal. Transfer the dough to the stone (I use my rolling pin for this, but a pizza peel would be ideal). Bake for about 8 minutes, until the bottom begins to turn golden brown. During baking, pop any bubbles that form with a fork.
5. Remove the pizza skin from the oven (you can put the second one in to bake now). We use tongs to do this. Place the skin on a pizza tray or very large plate, and top as desired (see below for ideas).
6. Return the pizza to the oven for 12-15 minutes, until the toppings are cooked and the cheese is starting to brown. (Top your second, now baked, pizza skin while the first one cooks, the stick it in when the first one is done.)
7. Let cool for a minute or two before slicing, and enjoy!

We don't have a sauce recipe nailed down yet, but we're working on it. For cheese, we use a blend of mozzarella and whatever else we have in the house - a recent favorite is aged provolone.

Topping ideas: 
Veggies (pictured above) - mushrooms, grilled bell peppers, and thinly sliced onions, topped with chopped cilantro (or basil) after baking. Layer half of the cheese under, and half of the cheese on top of the toppings to hold them in place. Sprinkle the top with Italian seasoning. You may need to dab up extra veggie juice from the top of the pizza after baking (to keep it from making the crust soggy later on).
Hawaiian - Nick's specialty, this has sliced almonds, diced ham, and chunks of pineapple (fresh if you can get it!), sprinkled with cinnamon. I only got one slice out of this whole pizza. It's mega delicious.

How do you top your pizza?

Thursday, December 1, 2011

Creamy Avocado Pasta, Cilantro Lime Edition

For dinner tonight, we tried a twist on a recipe I made for the first time last week. This Creamy Avocado Pasta Sauce comes together in less time than it takes to cook the pasta, making it a perfect week-night dinner option.  Last time, I followed the original recipe. The result was amazingly delicious.


This time, I made two switches. One was to try a different method for making the sauce. The original recipe calls for the use of a food processor, which not everyone has access to, and sometimes you just don't feel like cleaning it (for the third time that day). I thought if I put the garlic through my garlic press (you could also mince it), chopped the herbs, mashed the avocado with a fork, and stirred everything together, I'd still get a similar consistency. Although I'd call the result satisfactory, this more rustic version lacked the superb creaminess of the original. But, if you don't have a food processor, you can certainly still make this sauce. For me, in the future, I'll bust out the food processor.

The second change I made was to the flavor profile. Instead of lemon, I went with lime. Instead of basil, I decided to try cilantro. Why? Because that's what I had in the fridge, silly. Our basil plant sadly died over the holiday break, so we only have whatever herbs we buy at the store until the new seedlings mature. I'd say this second change was more successful than the first. I used the juice of a whole lime (instead of half of a lemon) because the lime was fairly small.
We ate this over quinoa rainbow veggie pasta curls. The flavor twist was a total success, and I see us eating this recipe again and again.

ShareThis

Related Posts Plugin for WordPress, Blogger...