Showing posts with label vegetarian. Show all posts

Monday, June 11, 2012

Meatless Mondays: Light Soba Noodles


Soba noodles have been a real favorite around here recently.  When I’m not in the mood for a dish as substantial as soba noodles with peanut sauce and shrimp, I like something lighter.  This fresh-flavored dish uses veggies to bulk up the whole-grain soba noodles, so you get a satisfying serving size while keeping your caloric intake reasonable.

This dish takes less than 20 minutes to put together (maybe 15, depending on how fast your water boils!).  It's vegan.  If you would like, you can pan-fry or broil some tofu for extra protein. Or, if it's not a meatless Monday in your house, shrimp might be really nice too.

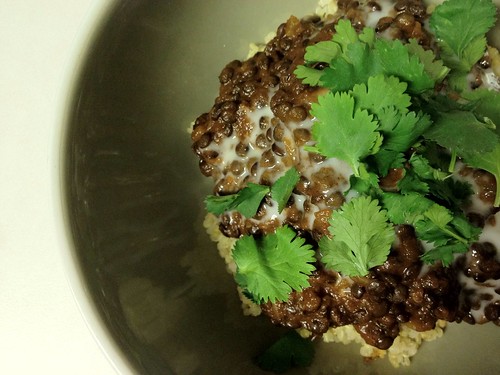
Light Soba Noodles with Veggies
You can customize the veggies in this dish however you like – snow peas would be delicious here.  
Yield: 2 servings

INGREDIENTS
3 oz soba noodles
1 bell pepper, stem and seeds removed, thinly sliced
1 cup shitake mushrooms, sliced
1 green onion, sliced
¼ cup cilantro, chopped
1 lemon, zest and juice
1 tbsp toasted sesame oil
1 tbsp light soy sauce
Sesame seeds

DIRECTIONS
1. Cook soba noodles according to package directions. (If your directions are in Japanese, and you don't read Japanese, it probably says to boil them for 6 minutes.)
2. While noodles cook, heat a skillet over medium heat. Spray with cooking spray, and add peppers and mushrooms.  Cook, stirring occasionally, until mushrooms are cooked and peppers are tender-crisp.
3. Combine lemon zest, juice, sesame oil, and soy sauce in a small bowl and whisk to combine.
4. When the soba noodles are finished cooking, drain and place in a medium mixing bowl. Add the cooked vegetables, green onion and cilantro, and dressing. Toss to combine. Portion into two bowls, and serve sprinkled with sesame seeds. 

I didn't have any leftovers to test my theory on, but I think this would be delicious as cold leftovers too.  If you try it, let me know!  

 Like what you read? Subscribe to the feed in your favorite feed reader, or follow me on Twitter to keep up with new posts! And don't forget to like me on Facebook!

Monday, April 23, 2012

Meatless Mondays: Moroccan Mint Tofu

I know some of you are thinking "great, tofu." It's one of those foods that a lot of folks love to hate - even some who haven't ever tasted it.  If you haven't tried tofu, I'd encourage you to give it a go. I've discussed tofu before, but the basic argument is that it makes a great platform for whatever flavors you like. Here, it gets a moroccan inspired spice rub, and then is simply broiled. Because it's pressed, the texture is crispy on the outside and chewy on the inside. This is a fast, easy, tasty way to get plenty of vegetarian protein.

If tofu isn't your thing, I'll be writing more about gardening later this week - we're starting to move more things outdoors, and I'm really excited! I've got one tomato seedling and one pepper seedling doing pretty well indoors, and they'll stay inside for another week or two until it gets a bit warmer. I still haven't got any of my eggplant seeds to start - I might try planting a few more seeds (in our seed starters) to get one going.

Those pesky robins continue to plague our deck. I haven't managed to completely dissuade them from building a nest on our lamp...they're apparently not very bright. I'm trying to keep an eye on things and make sure none of the neighborhood birds are after our seeds or seedlings - there are a lot of birds around right now!

 This recipe is vegan, and high in protein! If you're in a rush, you could press the tofu for as little as 15 minutes, and have this dish fully prepared in about 30 minutes. If you have time, pressing for the 30 minutes I suggest will give you a slightly better texture. We enjoyed this with some baked mushrooms (just spray them with a bit of cooking spray, and bake or broil until they look delicious).

Moroccan Mint Tofu
The rub I use in this recipe was inspired by 101 Cookbooks. Feel free to add some cayenne to the mix if you want your tofu spicy.
Yield: 2 servings

INGREDIENTS
1 block firm or extra firm tofu, sliced into 8 pieces and pressed*
2 tbsp olive oil
1 1/2 tsp dried mint
1 tsp ancho chili powder
1/2 tsp cumin
1/2 tsp cinnamon
1 tsp ground ginger
1 tsp salt

DIRECTIONS
*To press tofu, lay the slices in a single layer on a folded clean kitchen towel and cover with another folded towel. Place a baking sheet on top of the towels, and place some heavy objects (cookbooks work well) on top of the baking sheet. Press for 30 minutes or so.
1. Preheat the broiler (high). Line a baking sheet with parchment or a silpat.
2. Optionally, combine all spices and salt in a mortar and pestle. Grind until you have a fine, uniform powder.
3. Stir together oil and spices in a medium mixing bowl.
4. Cut pressed tofu slices in half and gently toss with oil and spice mixture. Arrange in a single layer on the prepared baking sheet.
5. Broil for 4-5 minutes, flip, then broil the other side 4-5 minutes, until tofu begins to turn golden. Enjoy!

Like what you read? Subscribe to the feed in your favorite feed reader, or follow me on Twitter to keep up with new posts!

Wednesday, April 18, 2012

Rainbow Carrot Salad

It's been a few days since I posted anything new. I was out of town this past weekend for a family member's funeral, so I didn't have time to cook anything, and frankly didn't feel like cooking anything for a few days. I'm getting back into the swing of things now, and I plan to resume my regular posting. I hope you didn't miss me too much!

This isn't a new recipe - it's my simple carrot salad, that I posted back in January. Then, it was a great way to bring freshness and sunshine to the dark winter. Now, it's a celebration of springtime. I used parsley instead of basil this time and rainbow carrots in place of regular orange ones. The flavor isn't remarkably different, but it is certainly visually interesting! The beautiful purple carrots have yellow or orange centers, providing a great mix of colors in the salad.


When I found these beautiful rainbow carrots at the store, I knew I had to make something with them that was simple- something that would really showcase the carrots. I considered roasting them (like these carrots and parsnips), but decided that this unfussy, raw salad was more in the spirit of the season.

So, although this isn't a new recipe, it's one worth repeating. And rainbow carrots are a great way to dress it up! 

Rainbow Carrot Salad
This is the same recipe as Simple Carrot Salad, and you can of course make this with regular orange carrots. As before, use any combination of basil, parsley, and mint that you like - whatever you can get fresh.
Yield: about 4 cups, enough to serve 8 as a side dish

INGREDIENTS
4 cups grated rainbow carrots
 Zest and juice of one whole lemon
2 tbsp olive oil
1/2 tsp ground coriander
pinch of salt
2 tbsp chopped fresh parsley (or more, to taste)
2 tsp honey
DIRECTIONS
1. Combine all ingredients in a bowl.  Stir, cover, and refrigerate for an hour or more.
2. Serve and enjoy! Refrigerate leftovers.


Like what you read? Subscribe to the feed in your favorite feed reader, or follow me on Twitter to keep up with new posts!

Monday, April 9, 2012

Meatless Mondays: Thai Coconut Mushroom Soup

I haven't posted a soup in a few weeks, even though I eat soup often.  Today, I wanted to share this delicious soup with you. It took me some time to figure out how to describe it. It is a very flavorful soup, with hints of ginger, citrus, mushroom, and coconut, but it is not assertive. There's no "kick in the mouth" about this soup - it's gently delicious.  Of course, you can make it quite spicy if you like, but I kept mine mild.

This soup starts with a simple lemongrass stock. It can be made ahead of time and refrigerated or frozen. The soup is quite simple, and takes less than 10 minutes to put together (once the stock is made). It would take less than an hour to make both the stock and the soup. If you want to make this on a weeknight, but are usually pressed for time, make the stock on the weekend and you'll have a very quick dinner later in the week.

This soup photographed really well, I think. But here's a secret: in person, it's a lot more...neon. Blame the turmeric combined with the slightly green stock, but it's an almost hilariously day-glow bright soup. Somehow, that just didn't translate to the photos (not that I mind!).
The soup and stock are both vegan.
Lemongrass Stock
Yield: about 1 quart of stock

INGREDIENTS
3 fresh lemongrass stalks,  roughly chopped
1 onion, peeled and roughly chopped
2 medium carrots, chopped
2-inch piece of ginger root, peeled and sliced
1/2 tsp whole peppercorns
1/2 tsp salt
6 cups water

DIRECTIONS
1. Combine all ingredients in a stock pot over high heat. Bring to a boil, then reduce heat and simmer 35 minutes.
2. Place a strainer over a large bowl, and strain out the vegetables. Use immediately, or refrigerate or freeze the stock for later use.


Thai Coconut Mushroom Soup
Yield: 4 servings

INGREDIENTS
1 recipe Lemongrass Stock (about 4 cups)
Juice of one lime
1 14.5 oz can coconut milk (light or regular)
pinch cayenne pepper (or to taste)
1/2 tsp turmeric
1/4 tsp coriander
1/2 block of tofu, about 6 oz, cut into bite-sized pieces
1 cup shitake mushrooms, sliced
1 tbsp chopped fresh herbs - cilantro, thai basil, or parsley work well
1 tsp salt, or to taste

DIRECTIONS
1. Combine stock, lime juice, and coconut milk in a pot over high heat. Stir in cayenne, turmeric, and coriander. Bring to a boil, then reduce heat to simmer and add tofu and mushrooms.
2. Simmer 5 minutes or so, then stir in fresh herbs and salt. Taste and adjust salt and heat to your preference.

We enjoyed this soup with some quick naan for dipping. This simple soup is one we'll be making again - I've been contemplating a chicken version too.

Like what you read? Subscribe to the feed in your favorite feed reader, or follow me on Twitter to keep up with new posts!


Monday, April 2, 2012

Meatless Mondays: Cucumber and Peanut Salad

For Meatless Mondays, I usually try to feature a main-course type dish that's either vegetarian or vegan. Today, I'm going to break with that convention a bit, because I want to share this salad with you. It's more of a side than a main course, but would work well paired with a soup.  It's quick and simple to prepare, and the flavors meld beautifully: sweet cucumbers with licorice-y fennel and crunchy roasted peanuts.

Salads like this are essential spring and summer dishes for me. Simple vegetables, served cold, are the perfect complement to sweltering evenings. It always amazes me how a few unassuming ingredients can combine into something so delicious. 

The recipe uses salt to draw out some of the water of the cucumbers. Don't worry, this salad isn't very salty - you will rinse the salt off of the cucumbers before combining them with the other ingredients.

You might notice that there are some pretty little herb plants sitting behind this salad. I saw them at the grocery this weekend and couldn't resist - at less than $3 each, these thyme and oregano plants were an easy addition to our gardening plans.

This recipe is vegan-possible: some vegans don't consume honey, but agave nectar or another sweetener can easily be substituted.

Cucumber and Peanut Salad
I call for persian cucumbers here, which are smaller and sweeter than regular cucumbers and seedless. Feel free to substitute regular cucumbers if you cannot find the persian variety; whether or not you remove the seeds is up to personal preference. 
Yield: 6 side-dish servings

INGREDIENTS
6 persian cucumbers (about 4 cups chopped)
2 tsp salt
1 tbsp honey
Zest and juice of one lemon
1 1/2 tsp white wine vinegar
1 tbsp extra virgin olive oil
2 tsp fennel seeds
2/3 cup roasted peanuts, crushed

DIRECTIONS
1. Slice the cucumbers into half-moon shapes, about 1/4 inch thick. Place in a colander and toss with the salt. Place the colander in the sink, and let sit for 15 minutes.
2. While the cucumbers sit, combine honey, lemon zest and juice, and vinegar in a small bowl and whisk to combine. To crush peanuts, place in a zip-top baggie and roll with a rolling pin a few times.
3. Rinse the cucumbers thoroughly, and drain well. Place in a mixing bowl. 
4. Heat a skillet over medium-low heat. Add oil and fennel seeds, and cook, stirring constantly, about 1 minute. Pour this hot oil over the cucumbers, and toss to combine.
5. Add lemon dressing and toss again. Stir in the peanuts shortly before serving.

In other somewhat-related-to-gardening news, we're having trouble with a few birds trying to build a nest on our deck - on top of a light that is far too small, so their nests keep falling apart, covering our deck in mud and sticks. I'm not sure how to convince them to give it up, because it's clearly a poor choice of location, but I'm getting tired of cleaning up after them constantly! I think they're robins. Any ideas?

Like what you read? Subscribe to the feed in your favorite feed reader, or follow me on Twitter to keep up with new posts!

Monday, March 26, 2012

Meatless Mondays: Pepper and Mushroom Pasta Salad

Last week, when I gave you my favorite method for roasting peppers, I promised this pasta salad. Although this week is going to be much more garden-focused than usual, I couldn't wait to share this recipe with you!

This is another recipe I like to make for lunches all week - it makes a lot of food, and is delicious hot or cold. It comes together quickly once the peppers are prepared - if you're crunched for time, use jarred peppers, or frozen roasted peppers (like I do - roast a bunch, then freeze them to have them on hand). Once the peppers are done, this barely takes more time than cooking the pasta - about 20 minutes.

This recipe is vegan, and thanks to the combination of pasta and beans, a source of complete protein. (It's also a fantastic source of flavor!)

Roasted Pepper and Mushroom Pasta Salad
Use any variety of mushrooms you like - a blend of wild mushrooms is fun, although I most often use regular white button mushrooms. I drain a can of chopped tomatoes for the tomato juice here - you need pure tomato juice, not a flavored/spiced version like V8.
Yield: 6 servings

INGREDIENTS
12 oz whole wheat pasta shapes (twists, shells, etc.)
10 oz mushrooms, sliced
2 bell peppers, roasted, peeled, and sliced into strips
2/3 cup rasins
1 14-oz can black beans, drained and rinsed
2 tbsp extra virgin olive oil
3 tbsp balsamic vinegar
3 tbsp tomato juice
1/4 tsp each salt and black pepper, or to taste
3 tbsp chopped fresh basil
1/4 cup chopped green onions

DIRECTIONS
1. Cook pasta according to package directions. Be sure to salt the water.
2. While pasta cooks, heat a skillet over medium heat, spray with cooking spray, and add mushrooms. Sautee the mushrooms until they give off their juices, then transfer mushrooms and any of their liquids to a large mixing bowl.
3. In that same mixing bowl, add roasted peppers, rasins, and beans. Stir to combine.
4. In a smaller bowl, whisk together oil, vinegar, tomato juice, salt, and pepper.
5. When the pasta finishes cooking, drain well. Then add the pasta to the large mixing bowl, and pour on the dressing.  Stir to combine, then gently stir in basil and green onions. Enjoy hot, and refrigerate leftover in individual servings for quick lunches.


Like what you read? Subscribe to the feed in your favorite feed reader, or follow me on Twitter to keep up with new posts!

Tuesday, March 20, 2012

How to Make Great Kale Chips


Kale chips are one of those foods that have blossomed from total obscurity to a fairly mainstream presence. It seems that there are as many posts on making kale chips as there are food bloggers. So why am I making my own? During the several years that I have been making kale chips, I've followed many different recipes. Each one seemed to prescribe a different time and temperature and even method for baking the chips. Through trial and error (and a lot of burnt kale) I figured out what works, what's important, and what is unnecessary.

If you haven't had kale chips before, give them a try! The leaves turn crispy in the oven, and have a taste akin to good broccoli. Some folks have touted these as a less-guilt potato chip swap - I don't agree with that assessment. If you really want potato chips, these don't taste like potatoes. But they are crunchy and salty and great to snack on.

Use whatever seasoning or spices you like, even just plain salt. I usually use a blend of salt, pepper, garlic powder, and paprika.


How to Make Kale Chips
Yield: depends on amount of kale used, usually 3-4 cups per bunch

You will need: 
1 bunch kale leaves (any variety)
Spray oil (like 100% canola oil cooking spray)
Baking sheet
Seasoning

How to make kale chips:
1. Preheat oven to 300 degrees.
2. Wash and dry your kale. You can use a salad spinner to dry the leaves, or pat them dry with paper towels. Sometimes kale is quite muddy, so don't skip this step.
Step 3: Tear kale leaves into chip-sized pieces, and discard the tough stems. I like pieces 1-2 inches across.
Step 4: Spread kale leaves on a large baking sheet in a single layer. Spray with oil (100% canola oil cooking spray works well for this). Toss the leaves with your hands and spray again. Sprinkle on your seasonings, and toss one more time, so all the leaves have a thin coating of oil and seasoning. Arrange in a single layer.
Step 5: Bake at 300 degrees for 18-20 minutes. Wait until the leaves are crispy (no soggy bits), but still bright green. If your oven bakes unevenly, turn the pan once during baking. 

Like what you read? Subscribe to the feed in your favorite feed reader, or follow me on Twitter to keep up with new posts!

Monday, March 19, 2012

Meatless Mondays: Roasted Eggplant and Tempeh


Roasted eggplant is one of those foods I never get tired of. I like oven-roasted veggies in general, like these potatoes, but eggplant probably tops the list. This recipe pairs a sweet and garlicy sauce with some simple roasted ingredients for a dinner that's big on flavor but not on fussy. 

Tempeh is a vegan protein source made from fermented grains, usually including soybeans. It has a nutty taste that mixes well with roasted veggies. I buy mine at Trader Joe's, and it's both organic and affordable - look for it near the tofu.

Unlike most of my other Meatless Mondays series posts, this one takes a bit longer, because the veggies have to roast. I'd allow an hour or so for preparing and cooking this dish.

This dish is vegan-possible, because the feta cheese I used on top is not vegan, but the rest of the dish is vegan.  Simply omit the cheese or use a vegan substitute.

Roasted Eggplant and Tempeh
I used butternut squash here, cubed and frozen when squash was in-season. You can substitute the squash of your choice, or sweet potatoes. Be sure to cut the vegetables and tempeh to similar sized chunks (about 1 inch cubes), so they cook evenly. Adapted from Super Natural Every Day, by Heidi Swanson.
Yield: 4 to 6 servings

INGREDIENTS
1 medium eggplant, cubed
2 cups cubed butternut squash
1 8-oz package tempeh, cubed
Zest of one orange
Juice of one orange
1 tsp salt
3 cloves garlic, finely minced
1 tsp smoked paprika
1/3 cup extra virgin olive oil
1/3 cup grade B maple syrup
1/2 cup chopped fresh cilantro
1/2 cup crumbled feta cheese

DIRECTIONS
1. Preheat oven to 350 degrees farenheit.
2. Combine eggplant, butternut squash, and tempeh in a large mixing bowl. Combine orange zest and juice, salt, garlic, paprika, olive oil, and maple syrup in a smaller bowl, and whisk to combine. Pour about 2/3 of this sauce over the vegetable mixture, and toss to combine.
3. On a large, rimmed baking sheet, arrange the vegetable mixture in an even layer. Bake about 30 minutes, stir, and bake 15 to 30 minutes longer, until it begins to turn golden brown.
4. Place the roasted mixture into a large serving dish, drizzle with the remaining sauce, and top with the cilantro and feta cheese. Serve family-style. Enjoy!

Tuesday, March 13, 2012

Orange Wheatberry Salad


Last week I promised a recipe to use your new orange segmenting skills, and here it is!

As spring comes rolling in early this year, I'm both grateful and dismayed. Grateful because I love the warmer weather, going for runs without bundling up like the kid from A Christmas Story, and because spring always feels like a time of renewal (Cheesy? Sure, but also true.) I'm dismayed because springtime also means wicked allergies.

In any case, spring also means the beginning of great produce. Farmer's markets won't start for another few months here, but produce at the grocery becomes much less expensive and more local. It's the flavors of fresh fruits and vegetables that I really associate with warm weather, and I'm always looking for that freshness. This salad brings that freshness, taking advantage of the end of citrus season to ease the transition into spring.


Wheatberries are the whole grain form of wheat - these are what is ground to produce whole wheat flour. They are sweet, chewy and nutty, with a great "pop" in the mouth. You could probably make this salad with other cooked whole grains, like farro, but I like wheatberries here.


This is a great salad to make on Sunday for weekday lunches - just portion the leftovers into individual servings in the refrigerator, and grab and go! You'll probably want to pair this with a protein to make a complete meal.

Orange Wheatberry Salad
For a step-by-step guide to segmenting oranges, see this tutorial.
Yield: 8 1-cup servings

INGREDIENTS
2 cups uncooked wheat berries
Salt and pepper to taste
4 oranges
Zest and juice of one small lemon
1 1/2 tablespoons extra virgin olive oil
3 large carrots, grated (about 2 cups)
1/4 c raisins
3-4 green onions, trimmed and sliced (about a heaping 1/4 cup)

DIRECTIONS
1. Cook the wheatberries. There are two methods you can use for this: stove top or slow cooker.
a. Stove top method: Soak berries in cold water for 8 hours or overnight. Drain and rinse the berries and place in a large pot. Cover by several inches of salted water and bring to a boil. Reduce heat to medium low, cover, and simmer until berries are tender and some break open, about an hour. Drain well and set aside to cool.
b. Slow cooker method: Place 2 cups of wheatberries, a pinch of salt, and 8 cups of water in the crock of a slow cooker (at least 3.5 quart size) and cover. Cook on high heat for 3 1/2 to 4 1/2 hours until berries are tender and some break open. Drain well and set aside to cool. (Adapted from Not Your Mother's Slow Cooker Cookbook.)
2. Zest oranges over a large bowl. Segment the oranges, and add the juice from the remaining membranes. Add lemon zest and juice, oil, salt and pepper and whisk to make a dressing.
3. Add cooled wheat berries and toss. Add orange segments, carrots, raisins, and green onions and toss again, or arrange for serving.

Like what you read? Subscribe to the feed in your favorite feed reader, or follow me on Twitter to keep up with new posts! 

Monday, March 12, 2012

Meatless Mondays: Weeknight Calzones


 You don't have to order delivery or settle for frozen to have great food on a weeknight. With a small amount of forethought and a bit of preparation, you can make weeknight dinners that are as good as delivery, arrive on the table quicker, and are better for your health.

These calzones require a bit of advanced planning, because they use frozen pizza dough. I suggest preparing a few batches of our favorite pizza dough, freezing them in individual rounds (each recipe yields two dough rounds, or two pizzas), so you can thaw them for weeknight use. With the dough already prepared, these take about 30 minutes to get on the table. 

Calzones are great because they are so easily and endlessly customizable. Each one can have totally different fillings, making it a great choice for people with different preferences. They're also a great way to use up leftovers, when you have a quarter of a bell pepper, a handful of mushrooms, two bites of spinach, and no idea what to do with it. Here I propose a veggie version of the hearty handpie, but meats are certainly a common filling option as well. Feel free to experiment!

I used parsley from our windowsill garden in these. It tastes much stronger than the parsley from the store (which usually tastes like almost nothing...), so a little went a long way. 


As I have made them, these are vegetarian (cheese being decidedly un-vegan). There is a moderate amount of cheese in the filling; if you like very cheesy things, add some extra mozzarella on top of the veggies before sealing up the calzone.

Weeknight Calzones
These are easy to customize, and each individual calzone can have different fillings. Use any vegetables or meats you like. 
Yield: 4 individual sized calzones

INGREDIENTS
1/2 recipe whole wheat pizza dough (or one pizza's worth of dough of your choice)
1/2 cup ricotta cheese
1/2 cup shredded mozzarella cheese
1/4 cup shredded asiago or parmesan cheese
a tablespoon or two of chopped fresh herbs (parsley, basil, oregano, etc.)
Veggies of choice for filling, or:
2 cups sliced mushrooms
1 cup sliced spinach leaves
Pizza sauce, to serve


DIRECTIONS
1. Thaw the pizza dough if frozen. (You can do this in the microwave, at 50% power, in 30 second increments until the dough is about room temperature.)
2. Place a pizza stone on a rack at the center of the oven. Preheat oven to 450 degrees.
3. Combine ricotta, mozzarella, asiago or parmesan cheeses and fresh herbs in a bowl and stir to combine.
4. Divide dough into 4 portions. Working with one portion at a time, roll out the dough into a roughly circular shape. (If your dough is sticking too much, lightly flour your work surface. I usually don't find this necessary.)
5. Spread 1/4 of the cheese mixture onto one half of the dough round (leaving a border, as pictured), and add desired toppings (but make sure you don't add so many you can't close the calzone!). Fold the un-topped half of the dough over the toppings and pinch the edges together tightly.
6. Poke some holes in the top of the calzone with a fork (so steam can escape).
7. Place the calzones on the pizza stone (or use a baking sheet) and bake for 12-15 minutes, until golden brown. 
8. Remove from oven, let cool slightly, and serve with pizza sauce.

Don't forget to check out the Meatless Mondays page for more great vegetarian and vegan meal ideas!

Like what you read? Subscribe to the feed in your favorite feed reader, or follow me on Twitter to keep up with new posts!

Wednesday, March 7, 2012

Simple Pan-Fried Tofu

After I made the muhammara earlier this week, I needed something to eat it on.  Sometimes, you need a base that is simply a vessel for a delicious sauce or topping. Pasta comes to mind, but all carbs all the time is bad news for me - I need more protein than that. This tofu makes a perfect base for whatever sauce you're looking for any excuse to eat (maybe this peanut sauce?). The tofu gets slightly crisp on the edges, chewy in the middle, and is a source of complete protein.

If you're not looking for a simple base, you can make the tofu the star of the dish by marinating it before cooking. I haven't come up with any particular marinade for you yet, but perhaps that will be a future meatless mondays series post. You may want to lightly salt your tofu slices before frying them, particularly if your sauce isn't very salty. 

I slice the tofu into large, thin pieces, then cut them up when I'm eating them. I've tried cooking tofu cut into smaller chunks, and I got so frustrated trying to flip 20 or more tiny pieces in the pan that it wasn't really worth the effort. I like using the slices because they are large enough to flip easily, and you still get lots of golden-brown edges.

Although you're using a few tablespoons of oil to cook the tofu, at least half of the oil will remain in the pan, and more of it will drain off onto paper towels. In the end, it's not that much oil per serving, so don't worry! (This is the oil left in the pan - at least a tablespoon, although I didn't measure it.)

The level of heat is important here. You want your oil hot enough, but not too hot. Hot enough means you need to pre-heat the pan, so the tofu isn't going into cold oil. (If the pan is hot, the oil will heat very rapidly - I don't wait between adding the oil and adding the tofu.) On my stove, the right heat is between 4 and 5 on the dial (5 is exactly medium heat). If the oil starts to smoke, or is splattering more than sizzling, turn back the heat a bit. It might take a few tries to figure out what exactly works for your stove.

Simple Pan-Fried Tofu
This is an easy way to prepare tofu, and quick enough for any night of the week. 
Yield: per block of tofu, 2-3 servings

INGREDIENTS
1 block of firm or extra firm tofu
2-3 tbsp olive oil (extra-virgin is fine)

DIRECTIONS
1. Drain the tofu, and use either a clean kitchen towel or paper towels to press out some of the excess water. Slice the tofu to your desired size (I make slices about 1/4 inch thick, about 15 per block of tofu), and lay in a single layer on top of some towels. Cover with another towel, and place a baking sheet with some cookbooks or other somewhat-heavy objects on top. Let sit for 15-30 minutes.
2. Heat a large skillet over medium heat.  Add 2 tbsp olive oil and about half of the tofu slices (or whatever fits in your pan). Cook for about 4 minutes on the first side, then flip and cook 2-3 minutes on the second side, until golden brown. (When flipping, be careful not to splash the hot oil.) Set up a plate with some paper towels.

3. Remove the tofu from the skillet to the prepared plate with towels to drain. Place another layer of paper towels on top and press lightly with the back of your spatula to remove the excess oil (don't use your hands, the oil is still very hot).
4. If you have remaining tofu to cook, add another few teaspoons to a tablespoon of oil to the pan, and repeat the process.
5. Serve topped with the sauce of your choice.


Like I said, I've been enjoying this with generous amounts of muhammara. I highly recommend it!

Like what you read? Subscribe to the feed in your favorite feed reader, or follow me on Twitter to keep up with new posts!

Monday, February 6, 2012

Meatless Mondays: Buttery Black Lentils

Black lentils 1


Today's recipe uses the flavors of Indian cuisine to liven up lentils. It is not, however, a curry; it relies on ginger, garlic, butter, a bit of chili powder, and some garam masala for flavor, and is overall mildly spiced. The meal is ready to serve in about 30 minutes. It serves 4; we eat the leftovers for lunch the next day.

Garam masala is a spice blend used in some Indian cuisine. Like curry powder, there are many different versions. For this recipe, I prefer a sweeter, more delicate version, like one that uses a lot of coriander. You can certainly blend your own garam masala (try googling for recipes).

I used black beluga lentils here, which cook faster than most other varieties of lentils. They are also fairly high in protein. If you can't find beluga lentils, you could use French/De Puy lentils, or  regular green or brown lentils, but the cooking time for the lentils will be 10-15 minutes longer.

Lentils don't require pre-soaking, so they are a good idea for a weeknight meal. To prepare them, you want to sort through the lentils, looking for any small rocks (which will be about the size and shape of the lentils), and remove the rocks. Then, place the lentils in a fine mesh strainer, and rinse until the water runs clear. When cooking the lentils, you don't want to add any salt, or anything acidic, until the beans are done cooking, to avoid making them tough.

I'm deeming this recipe vegetarian, but vegan-possible: to make it vegan, substitute either your favorite butter substitute (like Earth Balance) or extra virgin olive oil for the butter. That's it!

Black lentils2

Buttery Black Lentils
While the lentils cook, cook some brown rice or quinoa to serve the lentils over.  Grate the ginger and garlic on a microplane grater to create a fine paste.
Yield: 4 servings

INGREDIENTS
1 cup black beluga lentils, picked over and rinsed
2 cups water
2 tbsp fresh grated ginger, divided
3 cloves garlic, grated
1/2 tsp salt, or to taste
1/2-1 tsp pure chili powder - either hot, like cayenne, or mild, like ancho - to taste
1-6 oz can tomato paste
2 tbsp butter
1/2 medium onion, finely chopped
1/4 cup light coconut milk, plus a bit more to serve
1 tsp garam masala
Chopped cilantro, to serve
Cooked rice or quinoa, to serve

DIRECTIONS
1. Bring the water to a boil in a pan. Add the lentils, half of the ginger, and the garlic, and simmer, covered, over low to medium heat for 15 to 20 minutes, until tender but still firm.
2. Meanwhile, melt the butter in a skillet over medium-low heat, and add the onion and remaining ginger. Sautee until the onion begins to take on some color, 5 to 10 minutes, then remove from heat and set aside.
3. When the lentils are done cooking, stir in the tomato paste, chili powder, and salt. Heat to a simmer, then stir in the butter mixture, garam masala, and coconut milk.Taste, and adjust salt and chili powder to your liking.
4. Serve over hot rice or quinoa, drizzled with a little more coconut milk, and topped with chopped cilantro.

Like what you read? Subscribe to the feed in your favorite feed reader, or follow me on Twitter to keep up with new posts!

Friday, January 27, 2012

Meatless Mondays Series: Introduction

Malaga Goats


For the next few weeks, I plan on doing a "Meatless Mondays" series of posts. This series will feature recipes that are vegetarian, and sometimes vegan or vegan-possible (a few simple swaps makes it vegan).  Although I am neither vegetarian nor vegan, many people are.  Others simply want to reduce their meat consumption or branch out and try new things. There are as many reasons to go meatless as there are people who do so - environmental, ethical, health, preference - you get the idea!

The recipes in these posts will be simple enough to make on a weeknight, since this is meatless Mondays, not meatless rainy Saturday afternoons. I'll try to stick to ingredients that are pretty widely available, or suggest a substitute ingredient. The ingredients will be real, whole foods, and the end results will be delicious. Finally, these recipes should pack in the nutrition - although I'm not a nutritionist/dietitian/etc., I'm pretty sure eating your veggies is good for you!

If you're looking for some recipes to get you started, I've posted a few options already. Check these out: (both are vegan)
Curried Peanut Soup
Simple Avocado Soup

And one more promise: they won't all be soups! I find it's easiest to toss some veggies in a pot with beans and call that a vegetarian dinner, but I want these recipes to be exciting. Maybe even a bit adventurous. To expand your palate and culinary horizons, without expanding your waistline or breaking the bank.

The first recipe in the series will be coming up on Monday! 

Like what you read? Subscribe to the feed in your favorite feed reader, or follow me on Twitter to keep up with new posts!

Wednesday, January 18, 2012

My Hummus Recipe

Hummus used to be something that I only bought at the store. Once I found out how to make my own, however, I never went back to store bought! It is extremely easy to make your own hummus, and there are endless flavor variations to dream up.

This is my favorite basic hummus recipe - it seems that every person who makes hummus has their own. Mine only uses tahini for the fat/oil component; many others I have tried use some olive oil as well. I think using only tahini results in a better flavor.

A few notes about tahini: First, what is it? Tahini is a paste made from ground up roasted sesame seeds - kind of like peanut butter is ground up peanuts (except made with sesame seeds, naturally). It has a distinct, nutty flavor that makes a great addition to all kinds of dressings and spreads. Second, where can you find it? It is available at most supermarkets; look in either the natural foods or international aisles.  I have found that a 1-lb jar runs around $7-8, which will be enough to make several batches of hummus.

It's easy to change up the flavor by adding various spices for flavor or heat, fresh herbs, or a handful of fresh vegetables. If you want to get really crazy, you can try using green peas instead of chickpeas! One of my favorite variations is honey curry hummus (I add 2 tablespoons of curry powder, a pinch each of cumin and cayenne, and 2 tablespoons of honey to my recipe, and omit the paprika). Get creative with it!

hummus

This recipe makes a big batch, so you might want to try making only a half batch if you don't eat hummus very often. Alternatively, you can freeze some of the hummus for later.

I call for 2 small lemons here. To me, "small" means a lemon about the size of two golf balls, that fits easily in my palm. If you have larger lemons, more baseball sized, you might only want one lemon. 

Grace's Hummus
This hummus is flavorful and well balanced, with a hint of garlic and a lemony tang. 
Yield: about 4 cups

INGREDIENTS
3 cups cooked chickpeas (garbanzo beans), from 1 cup dry, OR 2 14.5 oz cans, drained and rinsed well
1/2 to 1 cup water
1/2 cup tahini
Zest and juice of 2 small lemons
3 garlic cloves, minced
1 tsp salt (start with less if you use canned beans)
1/2 tsp smoked paprika

DIRECTIONS
1. Combine all ingredients (start with 1/2 cup of water) in a food processor or blender. Process until well blended and slightly fluffy. Add a bit more water if needed.
2. Store, refrigerated, in an airtight container.

We eat this on carrot sticks and crackers, of course, but it is also great for making hummus melts: top a slice of bread with some hummus and sliced cheese, then place under a preheated broiler until the cheese browns and bubbles. Make it healthier by putting a layer of spinach or other greens under the cheese. Irresistible.

Hummus melt

Like what you read? Subscribe to the feed in your favorite feed reader, or follow me on Twitter to keep up with new posts! Find my recipes on Recipage.

Saturday, January 7, 2012

Carrot Salad: Bright Flavors in Winter

The past few days have been unseasonably warm here in Nebraska. As in, it was 67 degrees on Thursday afternoon. In JANUARY. But I'm not complaining - I'll take any hint of spring I can to get through winter. Naturally, I went for a run with the pooch outside, to take advantage of the sunny skies!

When I came back, we were in the mood for a summer-inspired dinner. Summer cooking for me, though, is about celebrating the bounty of fresh produce that is available. How do we bring those bright, fresh flavors into January? This carrot salad certainly did the trick. And because carrots are pretty much available (cheaply) anytime, you can bring a little summer to January too. We ate this with a chicken and prosciutto involtini that Nick made on the grill - and for once, it was actually comfortable to be outside grilling!

Carrot salad 1

I suppose the lesson I learned from this meal was to really celebrate the small moments - a warm day can be a huge bright spot in an icy winter.

Carrot salad 2

Carrot Salad
I call for fresh basil here, but you could use any combination of basil, parsley, and mint that you like - just use whatever you can get fresh. In the summer time, I might increase the amount of herbs, but here it lends a nice background note to the bright lemon and carrot flavors.
Yield: about 4 cups, enough to serve 8 as a side dish

INGREDIENTS
4 cups grated carrot (about 10 medium carrots)
Zest and juice of one whole lemon
2 tbsp olive oil
1/2 tsp ground coriander
pinch of salt
2 tablespoons chopped fresh basil (or more, to taste)
2 tsp honey

DIRECTIONS
1. Combine all ingredients in a bowl.  Stir, cover, and refrigerate for an hour or more.
2. Serve and enjoy! Refrigerate leftovers.

We saw a few sprouts starting in the windowsill garden this morning - hopefully I'll have a few baby plants to show you next week!

Thursday, January 5, 2012

Curried Peanut Soup and Quick Naan

We had a great holiday, filled with family time and lots of food! Now that the new year has started, it's back to a more normal routine. The new year also means a re-commitment to healthy habits for a lot of people, or at least a recovery from some serious indulging. For me, that means meals filled with veggies - and soup is a great way to pack the nutrition in.

This soup recipe has long been one of my favorites; it's spicy and nutty and slightly sweet - very satisfying! It comes together, start to finish, in thirty minutes or less.  I've included a quick whole-grain naan recipe that you can make in just a few minutes, because soup always needs bread for dunking.

Curried Peanut Soup 3

Curried Peanut Soup
This recipe uses chickpeas to extend the flavor of the peanut butter, giving lots of taste without tons of calories. Adjust the spiciness to your preference - I make it pretty mild.
Yield: 4 servings, about 2 cups each.

INGREDIENTS
1 tsp sesame oil
2 onions, chopped
1 tbsp grated fresh ginger root
1 1/2 tsp curry powder
1/2 tsp cumin
1 14 1/2 oz can diced tomatoes, NOT drained
3 cups veggie broth, divided
1 14 1/2 oz can chickpeas, drained and rinsed (about 1 1/2 cups cooked)
3 tbsp natural peanut butter
1/8 tsp cayenne pepper, or to taste

DIRECTIONS
1. Heat a 3 quart or larger pot over medium heat. Add the sesame oil, onion, and ginger, and sautee for about 5 minutes. Let the onion start to brown a little bit - this will bring out its natural sweetness. Stir occassionally.
2. In a blender, combine the chickpeas, peanut butter, and about 1/2 cup of broth. Blend until smooth, adding however much broth is needed to blend.
3. Add the curry powder and cumin to the onion mix, and cook stirring for 1-2 minutes.
4. Add the tomatoes, remaining broth, and chickpea puree to the pot. Increase the heat to bring to a boil. Reduce heat and simmer about 5 minutes. Stir in cayenne pepper.
5. Remove the soup from the heat and let cool slightly. Using an immersion blender, or working carefully in batches, blend the soup until it is smooth. Serve with bread for dunking.

Curried Peanut Soup 1

Quick Whole Grain Naan
Although this recipe isn't traditional, relying on baking powder rather than yeast to give the naan its characteristic bubbles, it produces a soft and tasty bread in only a few minutes. 
Yield: 4 large naan

INGREDIENTS
1 cup whole-grain spelt flour, or white whole wheat flour
1/2 tsp baking powder
1/2 tsp honey
pinch salt
1/2 cup water

DIRECTIONS
1. Preheat a skillet over medium high heat.
2. Combine all ingredients in a bowl, stir until the dough comes together.  If needed, add more water a teaspoon at a time. Knead the dough until you have a smooth ball.
3. Divide the dough into 4 pieces.  On a lightly floured surface, roll out a piece of the dough to 1/8 inch thickness.
4. Spray the pan with a bit of olive oil, then add the rolled dough.  Cook for a minute or so, until bubbles form on the surface and brown spots develop on the underside. Flip, and cook for an additional minute or so. Repeat with remaining dough.
5. Slice the breads into wedges, 6 or so per bread, using a sharp knife. Enjoy!

We started our windowsill garden yesterday - more on that later!
Starting the windowsill

ShareThis

Related Posts Plugin for WordPress, Blogger...