Showing posts with label healthy. Show all posts

Friday, July 6, 2012

What's been going on in our kitchen lately...

I haven't been posting as often recently, but I've still been cooking quite a bit! I thought a link round-up might be a fun way to give you an idea of what's been happening in our kitchen. 
 Some things we've enjoyed:

This blueberry skillet cake - it's quite healthy, vegan, and tastes like a blueberry muffin. I used whole wheat pastry flour and fresh blueberries (I skipped the cornstarch). We'll definitely make this again.

Grilled corn.  No link for this one - we just brush the shucked ears in some butter and throw them on the grill. We've also been grilling just about every other vegetable that comes through our kitchen.

This soy and maple glazed tempeh - I cook it in a skillet, but it can also be prepared on the grill. I used a pinch of smoked paprika instead of cayenne.

Honey curry hummus - the recipe I mentioned in this post. I hadn't made it in a while, but I'm glad I did!

This maple cinnamon almond butter, a perennial favorite. 

I finally made my own sourdough starter, and I've been working on some sourdough breads and buns. I'm not a huge sourdough fan, but Nick loves it and assures me it is delicious. 
 Homemade Challah - this is one of my favorite breads.  I just use the Joy of Cooking recipe, and it turns out great.
I've also been making some broiled tofu, stir-fries, and other simple dishes. Summer isn't the season to spend piles of time in the kitchen, so we're enjoying simple, fresh things for the most part. 

What have you been enjoying lately? 

 Like what you read? Subscribe to the feed in your favorite feed reader, or follow me on Twitter to keep up with new posts! And don't forget to like me on Facebook!


Wednesday, April 18, 2012

Rainbow Carrot Salad

It's been a few days since I posted anything new. I was out of town this past weekend for a family member's funeral, so I didn't have time to cook anything, and frankly didn't feel like cooking anything for a few days. I'm getting back into the swing of things now, and I plan to resume my regular posting. I hope you didn't miss me too much!

This isn't a new recipe - it's my simple carrot salad, that I posted back in January. Then, it was a great way to bring freshness and sunshine to the dark winter. Now, it's a celebration of springtime. I used parsley instead of basil this time and rainbow carrots in place of regular orange ones. The flavor isn't remarkably different, but it is certainly visually interesting! The beautiful purple carrots have yellow or orange centers, providing a great mix of colors in the salad.


When I found these beautiful rainbow carrots at the store, I knew I had to make something with them that was simple- something that would really showcase the carrots. I considered roasting them (like these carrots and parsnips), but decided that this unfussy, raw salad was more in the spirit of the season.

So, although this isn't a new recipe, it's one worth repeating. And rainbow carrots are a great way to dress it up! 

Rainbow Carrot Salad
This is the same recipe as Simple Carrot Salad, and you can of course make this with regular orange carrots. As before, use any combination of basil, parsley, and mint that you like - whatever you can get fresh.
Yield: about 4 cups, enough to serve 8 as a side dish

INGREDIENTS
4 cups grated rainbow carrots
 Zest and juice of one whole lemon
2 tbsp olive oil
1/2 tsp ground coriander
pinch of salt
2 tbsp chopped fresh parsley (or more, to taste)
2 tsp honey
DIRECTIONS
1. Combine all ingredients in a bowl.  Stir, cover, and refrigerate for an hour or more.
2. Serve and enjoy! Refrigerate leftovers.


Like what you read? Subscribe to the feed in your favorite feed reader, or follow me on Twitter to keep up with new posts!

Wednesday, March 21, 2012

Takeout Fake-out: Orange Chicken

When I posted our orange bourbon chicken recipe, I mentioned how we had purchased a frozen orange chicken meal from Trader Joe's a few times. Confession: I love Chinese takeout, and I'd gladly eat it several time a week if it were at all good for me. My orange chicken cravings have continued (to no one's surprise), and I knew we needed to come up with a simple, baked alternative that we could make ourselves. No fuss, no deep fryer, just great food.

Like our weeknight calzones, this recipe is designed to be faster and healthier than takeout - not to mention easier on the wallet. When the weather gets warmer, I tend to want to spend less time in the kitchen, so a quick meal becomes more appealing. Having recipes like this in my repertoire keeps me from picking up the phone to order takeout - because I can make the food - from scratch - faster than I can get it delivered!

This dish is actually quite easy to make, and takes about 20 minutes, start to finish. I broke the directions down into a lot of individual steps, but they're all quick and simple.


Curious about those green onions? Check out this post - they're super simple to grow yourself! 

Orange Chicken: Takeout Fake-out
This orange chicken tastes as good as take-out, but is baked instead of fried.
Yield: 2 generous servings

INGREDIENTS
For the chicken:
1/4 cup plus 2 tbsp whole-wheat flour
1/4 cup plus 2 tbsp panko bread crumbs
1 lb raw boneless skinless chicken breast, cut into bite-sized pieces
pinch each salt and black pepper
1 egg, lightly beaten

For the sauce:
1/2 cup warm water
2 tbsp cornstarch
2 oranges, zest and juice
2 tbsp mirin
1/4 cup honey
2 tbsp lite soy sauce
2 tsp toasted sesame oil
2 cloves garlic, minced
2 tsp grated fresh ginger
Sliced green onions, sesame seeds, and hot rice to serve

DIRECTIONS
1. Preheat oven to 375 degrees. Spray a baking sheet with nonstick spray or line with parchment.
2. Place flour and bread crumbs in a gallon sized baggie.
3. Place chicken in a large bowl with egg and season with salt and pepper. Stir to coat chicken pieces with egg.
4. Add the chicken to the baggie with the bread crumb mixture, one piece at a time, shaking off excess egg. Seal the baggie (with extra air inside), and toss to evenly coat chicken pieces.
5. Spread chicken in a single layer on the prepared baking sheet, and bake for 10 minutes, or until chicken is cooked through.
6. While the chicken cooks, in a medium bowl, whisk warm water with cornstarch until cornstarch has dissolved. Add orange zest and juice, mirin, honey, and soy sauce and whisk to combine.
7. Heat a skillet over medium heat. Add sesame oil, garlic and ginger and cook until slightly softened and fragrant, about 1 minute. Add juice mixture. Cook, stirring, until thickened, 1 to 2 minutes.
8. Remove skillet from heat, add chicken, and toss to coat. Serve topped with green onions and sesame seeds over hot rice.

What takeout or restaurant meal do you wish you could create at home? Do you have any of your own takeout fake-outs? 

Like what you read? Subscribe to the feed in your favorite feed reader, or follow me on Twitter to keep up with new posts!   

Monday, February 20, 2012

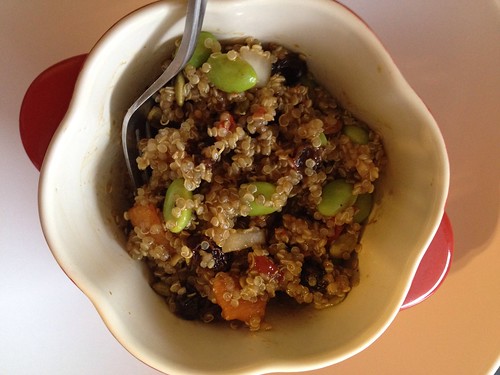
Meatless Mondays: Quinoa Salad

 Quinoa salad


We had a great weekend, including our first 5k trail race (which was MUCH more difficult than I imagined!), and my first feature on foodgawker!  If you're here because of that post, welcome! Settle in, and have  a look around.

When preparing for the week, I find it helpful to cook a few large-batch recipes on Sunday afternoon. That leaves me with most of my lunches and dinners already prepared for the week. This quinoa salad is one of my favorites. It is simple to prepare, provides two vegan sources of complete protein (quinoa and edamame), and the leftovers are very tasty. It can also be doubled, tripled, or whatever you like very easily.

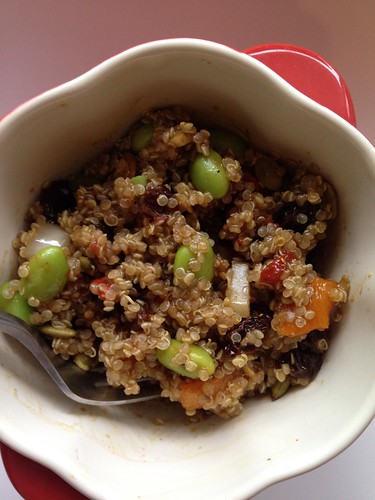
Quinoa salad2

If you haven't tried quinoa before, I encourage you to do so! It boasts a pretty solid nutritional profile,  and is a fun change-up from brown rice. For carb-based salads, I prefer whole grain salads to pasta salads (like wheat berry or quinoa salads) because I find they keep me much fuller and provide steadier energy. This salad is a great place to start.

This recipe is vegan (although, be sure to check your mustard ingredients, and note that some vegans do not consume honey). I used some leftover roasted bell peppers instead of fresh bell peppers, but I recommend fresh if you have them.

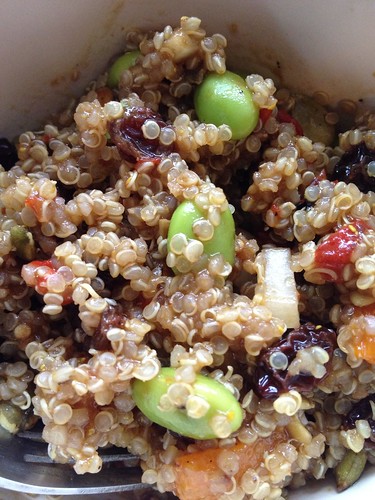
Quinoa salad3

Quinoa Salad
Yield: 4 servings

INGREDIENTS
For Salad: 
1 cup dry quinoa
1 cup chopped red or yellow bell pepper
1 cup shelled edamame, thawed if frozen
1/2 cup minced onion
1/2 cup raisins
1 oz pumpkin seeds

For Dressing:
1/4 cup extra virgin olive oil
1/4 cup balsamic vinegar
1 tbsp plus 1 tsp honey dijon mustard

DIRECTIONS:
1. Cook quinoa according to package directions. (I combine 1 cup quinoa with two cups of water in my rice cooker.)
2. While the quinoa cooks, combine remaining ingredients for salad in a large bowl. Stir to combine, and set aside. Combine ingredients for dressing in a smaller bowl, whisk together, and add to the salad bowl. Stir to combine.
3. When the quinoa is finished cooking, add it to the salad ingredients, and stir to combine. This salad can be served hot or cold. For easy lunches, portion leftovers into individual containers in the fridge - then just grab one to take for lunch.

Like what you read? Subscribe to the feed in your favorite feed reader, or follow me on Twitter to keep up with new posts!

Thursday, February 2, 2012

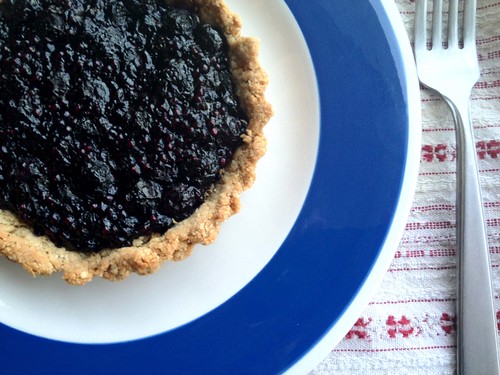
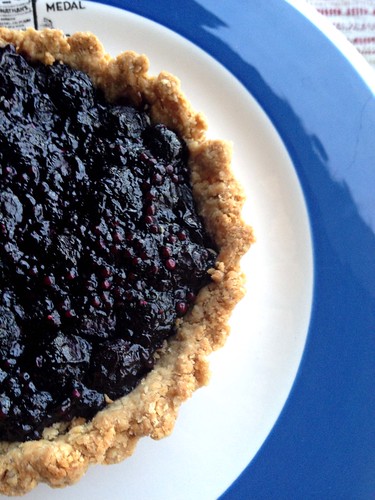
Healthy Blueberry Tarts

 blueberrytart5

If I had to pick a favorite flavor of pie, it would be blueberry, hands-down. Maybe it's the weather lately (it got up to 70 degrees on Monday!), but this summer classic seemed like it could use a healthy make-over to me. Looking through recipes, I found a few themes: the filling wasn't bad, if you didn't add to much sugar, but the crust had too much butter. In my recipe, below, olive oil substituted nicely for some of the butter, and greek yogurt provided the remaining moisture and binding power I needed.

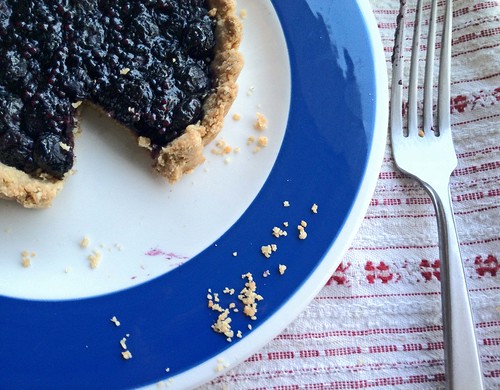
blueberrytart2

 The recipe makes individual tarts, which is a fun way to serve.  However, the filling holds together and slices easily, so you should have no trouble if you make a large tart. You might want more filling though, depending on the size of your tart pans. I have found that when miniaturizing a pie/tart recipe, less filling is needed for the same amount of crust. If I were making a full-sized tart, I would double the amount of filling.

 blueberrytart4

Healthy Blueberry Tarts
If you don't have tapioca pearls, you can try tapioca starch here (which is found in many traditional recipes).  And as I've mentioned before, oat flour can be made by grinding up rolled or instant oats in your food processor until you get a flour-like consistency. 
Yield: 4 tarts

INGREDIENTS
For the crust:
3/4 cup oat flour
3/4 cup white-whole wheat flour
pinch salt
2 tbsp maple syrup
1 egg yolk
1/4 cup olive oil
1/4 cup plain greek yogurt

For the filling:
2 cups blueberries (thawed if frozen)
1/4 cup maple syrup
pinch salt
2 tbsp tiny tapioca pearls
Zest of one orange
pinch of nutmeg

DIRECTIONS
Start the crust and filling at the same time - both need a rest period. Then, while the crust blank-bakes, cook the filling on the stove top, so both will be ready to bake together at the same time. 

For the crust:
1. Combine flours and salt in a bowl. Make a well in the middle, and add remaining crust ingredients. Stir until just combined. Cover and refrigerate for one hour.
2. Preheat oven to 375 degrees. Prepare 4 four-inch miniature tart pans by spraying with cooking spray. Arrange on a baking sheet. Press 1/4 of the chilled dough into each tart pan, pressing up the sides to the edge of the pan.
3. Lay a small piece of aluminum foil in each pan, and fill with dried beans (or use pie weights).  Bake the tart shells for about 10 minutes.

For the filling:
1. Mash about half of the blueberries. Stir together all of the filling ingredients in a bowl, cover, and let sit while the tart dough chills (about an hour).
2. While the tart dough bakes, place filling in a small saucepan over medium heat, and cook, stirring very frequently, until the mixture becomes quite thick. Set aside until the tart shells are done baking.

Making the tarts:
1. Divide the cooked filling evenly between the tart shells, and return to the oven. Bake for about 20 minutes, until the edges of the tarts are golden brown.
2. Cool at least 30 minutes before serving.

blueberrytart1

Like what you read? Subscribe to the feed in your favorite feed reader, or follow me on Twitter to keep up with new posts!

Thursday, January 19, 2012

Apple Oat Scones

As much as I love to bake, that love is tempered by the amount my jeans will stretch. So I'm always looking for a way to healthy-up a baking recipe - reducing the sugar and butter, and making sure there's lots of nutrition packed in. Granted, my holiday baking doesn't reflect this at all, because I think christmas cookies just need to be the real deal. But most of the time, a few simple tweaks can make a recipe both tasty and healthy enough to eat every day.

Some of my favorite tricks are substituting part or all whole-grain flours for white flour, reducing sugar by 25% or so, or replacing sugar with honey or maple syrup, swapping butter or oil for applesauce or pumpkin puree. Adding some form of nuts and/or fruit both adds flavor and nutrition content. And in short order, I can have a whole new recipe. Occasionally, a few too many swaps will turn the recipe into something unrecognizable. But other times, the recipe is a definite keeper, like these scones.

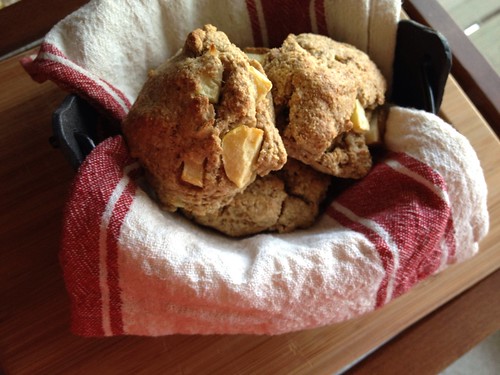
Apple oat scones

Enjoy these for breakfast or as a snack. They're best if you warm them for a few seconds in the microwave. Top them with butter and honey if you like, but I enjoy them just as they are. 

Apple Oat Scones
These are slightly sweet, with a fantastic nutty flavor from the grains. To make oat flour, process oatmeal in a food processor until you reach a flour-like consistency. 
Yield: 16 scones

INGREDIENTS
2 cups whole wheat flour
1 3/4 cups oat flour
1 tbsp baking powder
3/4 tsp salt
1/2 tsp cinnamon
1/2 c sliced almonds
1 apple, peeled, cored, and chopped
1/4 cup butter
1/4 cup maple syrup
1/4 cup applesauce
2 eggs
1 t vanilla
1/2 cup milk or almond milk, plus additional for brushing.

DIRECTIONS
1. Combine flours, baking powder, salt,  and cinnamon in a large mixing bowl. Cut the butter in using a pastry cutter or a fork, until the mixture is slightly crumbly. Stir in the almonds and apple.
2. In a second bowl, combine maple syrup, applesauce, eggs, vanilla, and 1/2 cup milk. Stir to combine, then add to the dry ingredients. Stir until the mixture comes together. It will be fairly dry, but be sure all of the flour is incorporated.
3. On a baking sheet lined with parchment, scoop out about 1/4 cup dough at a time, and shape each into a slightly flattened disc. Brush the top with milk, and transfer the sheet to the freezer. (Note: you can put all the scones on the same sheet for this step, then separate them for baking). 
4. Freeze for about 20 minutes, while you preheat the oven to 425 degrees.
5. Remove the scones from the freezer (divide between two trays if needed, leave about 2" between each scone), and bake for about 20 minutes, until the top is golden brown. Let cool for a few minutes on the sheet, then remove to a wire rack. Enjoy warm. 


Like what you read? Subscribe to the feed in your favorite feed reader, or follow me on Twitter to keep up with new posts! Find my recipes on Recipage.

Wednesday, January 11, 2012

Riesling Poached Pears and Sorbet

If you're like me, you're always looking for something sweet to round off a meal. If you're like me, you also want your food to be healthy, so your body is properly fueled.  But eating healthily doesn't have to mean skipping dessert! Like so many other aspects of healthy living, all you need is a little shift in perspective. I've heard people complain that fruit can't possibly substitute for dessert, and I would agree that an apple won't satisfy a cake craving. But with a bit of creativity, a simple piece of fruit can be dressed up into something truly satisfying.

In the spirit of making simple food delicious, this recipe takes whole pears and makes them into a crave-worthy desert. And if the idea of cutting into a piece of fruit isn't dessert-y enough for you yet, you can take a few extra steps to make a gourmet sorbet to satisfy your sweet tooth.

Poached pear plated

Riesling Poached Pears
You can use any varietal of wine you like here, but Riesling pairs very well. Feel free to substitute fruit juice for wine in any proportion you like. Depending on the sweetness level of your wine or juice, vary the amount of honey added.
Yield: 6 poached pears

INGREDIENTS
6 whole pears (any variety), peeled
1 750ml bottle of Riesling wine
1-2 cups water (as needed)
1/4 cup honey
1 lemon, ends removed, cut into 1/4 inch thick slices
Optional, to serve: goat cheese and honey

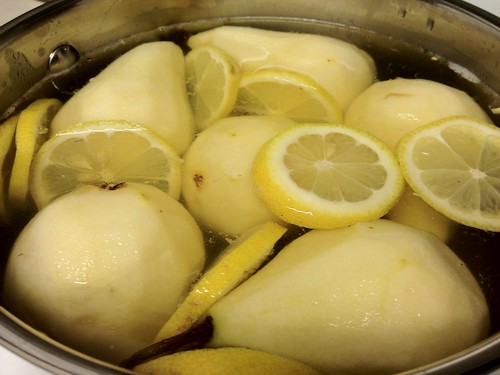
Poaching pears

DIRECTIONS
1. In a pan large enough to place pears in a single layer, combine all ingredients and add enough water to let the pears float a little.
2. Bring to a simmer over medium heat. Simmer 15-30 minutes, until pears are just tender.
3. Remove pears from poaching liquid. If storing, store with a bit of the poaching liquid so they don't dry out. Reserve lemon slices for serving if you like.
4. Serving suggestion: Combine about 1 oz of goat cheese per serving with a few teaspoons of honey. Place on a plate, and use the cheese to hold the pear upright. Garnish with lemon and honey.

Now, if you'd like to take things a few steps further (or if you have leftovers!), you can make sorbet with these pears following the recipe below. This was inspired by a great ice cream store, Jeni's, who make (surprise!) a Riesling Poached Pear sorbet.

Pear sorbet

Riesling Poached Pear Sorbet
Freezing the fruit before pureeing it yields a sorbet-like texture, rather than a too-solid block of fruit ice. The lemon that was in the poaching liquid lends a tangy note to the finished sorbet, so if you want something that is more purely sweet, you can omit the lemon in the poaching step.
Yield: about 3 cups, depending on the size of your pears.

INGREDIENTS
6 Riesling Poached Pears (recipe above)
Optional: honey, to taste

DIRECTIONS
1. Remove the core, seeds, and stem of the pears. Cut the fruit into 1-2 inch chunks.Place in a single layer on a cookie sheet, and freeze for a few hours.
2. Place pears in a food processor. Let run until smoothly blended, scraping down the sides several times.
3. If you want to, drizzle some honey over the blended pears, to create a honey swirl when you pack it. It won't stir in because the pears are too cold.
4. Package in an airtight container and freeze. Enjoy!


I mentioned on Twitter that our sprouts are starting to grow, and I'm pretty excited about our windowsill gardening adventure! The sprouts should start looking like baby plants soon.

ShareThis

Related Posts Plugin for WordPress, Blogger...