Showing posts with label garden. Show all posts

Thursday, June 7, 2012

Garden Snapshots: Hello, June!

A lot has changed in our garden since I last showed you some pictures. Squash and beans are taking off, the tomato and pepper plants seem healthy (if small), and something ate the kale, spinach, and mint. No, it wasn't me! I wish. In any case, we've had a few ups and downs, but overall I think we're progressing nicely.

I think I need to thin this basil! But it is coming along nicely.

The Tom Thumb lettuce is growing beautifully - we'll be eating a lot of this soon, and then I'll let the rest fully grow. 

Tomorrow, I'm talking potatoes! And I'm planning to try some new popsicle flavors this weekend, so stay tuned for those too. 

Like what you read? Subscribe to the feed in your favorite feed reader, or follow me on Twitter to keep up with new posts! And don't forget to like me on Facebook!! 

Wednesday, May 9, 2012

Container Garden: Fully Planted!

Cooper loves being out on the deck!  We're worried that he'll try to eat some of the plants as they get larger (he considered munching on some of our seedlings!)...we'll be keeping an eye on him.  Although he doesn't like Swiss chard. So I guess that plant is safe at least.

This past weekend, Nick and I finished planting everything in the garden. There aren't a lot of sprouts to show you yet, but we ended up changing the layout from what I had planned. We're trying to maximize the amount of sunlight that the plants get, and it works with the space, so I'm happy.

The shelves really gave us more space for lettuces and herbs. The lettuces have started to take off this week - I thinned them once last week, but I'm going to have to thin them again very soon! In the photo above, you can see the lemongrass that I regrew and planted - it seems to be doing well.  Just like with the green onions, I saved the root ends and placed them in water until they regrew roots. Then I transplanted them into dirt outdoors. 

Our tiny tomato and pepper plant transplants are doing well so far - they're SO small, but seem to be thriving. The oregano and thyme that I though had totally bitten it show signs of some new growth - I need to trim away the dead stuff, but I think they'll come back for me, especially with a little compost added.

The herbs in the railing planters are still doing fine, and a lot of the mint sprouted.

Hopefully we'll have some new sprouts by next week - I'm excited for things to really get started!

Like what you read? Subscribe to the feed in your favorite feed reader, or follow me on Twitter to keep up with new posts! And don't forget to like me on Facebook!! 


Thursday, May 3, 2012

Garden Snapshots: New Sprouts!

I just wanted to share a few quick pictures with you today! Since planting about half of our outdoor container garden, we've got a few things starting to grow. 


Some carrot sprouts: (both Danver's Half Long and Nutri-red varieties)
Some dill sprouts:

The lettuces continue to do well, and the mint is starting to sprout! Some of the transplanted mint seems to have died, but there are tiny sprouts popping up all over the pot. 

The name of the game will be thinning - and soon. I probably planted too many seeds, but I've had such hit-or-miss luck with germination that I just wanted to get some in the ground (well, pot) and figured I could always thin them later.  Looks like we'll be having some sprouts salads this week!

Unfortunately, my thyme and oregano plants (which I purchased at the store on a whim) seem to have bitten the dust. I'm not sure why, but all of the other plants are doing well.  I still don't have any eggplant sprouting, but I'll be transplanting and planting the remaining plants and seeds outdoors this weekend. I'm excited to have the garden fully planted!

Like what you read? Subscribe to the feed in your favorite feed reader, or follow me on Twitter to keep up with new posts! And don't forget to like me on Facebook!!

Friday, April 27, 2012

Container Gardening: April Update

 We've started the first of our outdoor gardening containers this week! I had hoped to start early this year, because we had such a warm spring, but the last few weeks have been much more typical weather which included a few drops below freezing. So it turned out to be a good thing that I was too busy to start earlier.

We prepared our buckets by drilling some holes in the bottom for drainage.  Nick was in charge of the power tools here:

And I planted our herbs, lettuces, and carrots. I haven't planted the basil yet. The other plants will wait a few more weeks until it gets a bit warmer. The butter lettuce and tom thumb lettuce have started to sprout (I'll have to thin them very soon!), and the kale and spinach are still doing well. 

That means the following things have been planted:
  • Carrots
  • Tom Thumb Lettuce (sprouting)
  • Buttercrunch Lettuce (sprouting)
  • Spinach (early April, sprouted)
  • Swiss Chard (transplanted)
  • Kale (early April, sprouted)
  • Mint (some transplanted)
  • Dill
  • Chives (some transplanted)
  • Parsley (a few more seeds added)

And the follwing have yet to be planted outdoors:
  • Tomato (seedling started)
  • Peppers (seedling started)
  • Eggplant (seed planted, but no seedlings yet...)
  • Basils (some seedlings started)
  • Cilantro (I swear this stuff hates me)
  • Squashes
  • Beans

I transplanted the swiss chard that we had growing in our windowsill garden rather than starting it over from seed. Unfortunately, it had started to look a bit rough because it seriously outgrew the 6 inch pot it was planted in, but I'm hoping it will recover in its new, much larger pot. I also transplanted the mint and chives; they haven't died on me yet, but we'll see how well they withstood the move after another week or so I think. I love all of the colors of the rainbow chard!
None of the plants are in their final position yet; we'll have to move them all around (and set out the shelving unit) when I plant the remaining ones. In any case, so far, so good!

Like what you read? Subscribe to the feed in your favorite feed reader, or follow me on Twitter to keep up with new posts!

Thursday, April 5, 2012

Gardening DIY: Making a Watering Can

 You can use an old laundry detergent container to make a great watering can for your container garden. I found this idea on Pinterest, along with other ideas using other types of containers (for instance, milk jugs). I decided to go with the laundry detergent container option because the container seems much sturdier to me, and will hold a large amount of water.

Before beginning, make sure your laundry detergent container is very well cleaned out. You don't want it to smell like detergent anymore. Also, you'll probably want to remove the pouring spout from the container. I didn't because it makes it easier to add water to the bottom of the self-watering planters, but it messes a bit with the water flow. The detergent bottle I used came from Sam's Club, so it's a really large size, which I like for this project.

There are two levels of this project. The first level is the functional watering can. The second level is the aesthetic upgrade. I wanted my watering can to look a bit less like clorox and blend in more - you could paint yours in any color or design you like, or don't paint it at all! Your choice.

This is a free DIY project if you don't pretty-up the watering can: the laundry detergent container was headed for the recycling anyways. If you spend a bit of cash on the extras, it's still only a few dollars - I spent $6, total. 

How to Make a Watering Can
What you'll need:
Old laundry detergent container, well cleaned out
X-acto knife
Drill with small bit OR hammer and small nail
Optional:
plastic spray paint (like Krylon fusion)
Twine (I used jute)
Scissors

Directions:
1. Cut a small hole in the handle of the detergent container. This is necessary to vent air so the watering can pours smoothly.

2. Drill or poke small holes in the top of the detergent lid. (Set the lid on something you don't mind destroying to protect your table surface, like an old magazine.) I used a 1/16th inch drill bit; the size, number and distribution of the holes is up to you.  I made many small holes because I was trying to create a gentle shower effect.  Now you have a functional watering can! You can stop here, or continue. 

3. Spray paint the bottle and cap (separately).  You'll need to use a plastic-bonding spray paint to do this. I used Krylon Fusion. (Be sure to follow the paint can directions for this part.)
 4. Once the paint is fully dry - I waited overnight - use twine to wrap the handle and cap - the parts of the can you will be gripping. I did this to make it easier to use the watering can when wet, and to prevent wear marks on the spray paint. I used a simple half-hitch wrap, as described here*, with about 8 feet of twine for the handle. I used the same technique to wrap the cap.  You could also use glue to attach the twine.
 *That link is to a forum for zombie apocalypse preparedness enthusiasts, as far as I can tell. In any case, the tutorial is good. 

A close-up of the handle wrap:
And that's it! Of course, you could decorate or customize your watering can differently. Have fun with it!


Wednesday, April 4, 2012

Gardening: Seed Starting

 Even though the weather is unseasonably warm, our container gardening plans continue only a bit ahead of schedule.  We have kale and spinach sprouting outside:
Along with the oregano and thyme we picked up this past weekend.  If the temperatures start to get really cold all of the sudden (if the weather wakes up and returns to normal March weather), we can easily move these containers indoors. But for now, they're getting started outside!

The robins I mentioned earlier this week seem to have finally given up building their nest on our deck lamp - I sprayed it with some disinfectant, and maybe the smell scared them off? Or maybe they found somewhere else to build their nest, where it would actually stay put. I'll be scrubbing the lamp down this weekend if they've stayed away. It's pretty messy, but I didn't see the point in making it shine if they were just going to return the next day. I've been cleaning the deck and railing almost daily already.

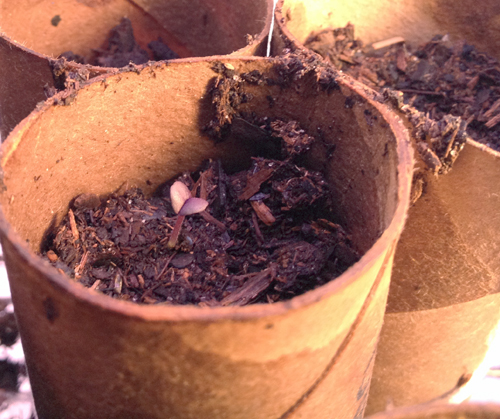
Indoors, we're starting our seeds in toilet paper tubes, like I mentioned in our gardening budget post. The cardboard can either be peeled away or will decompose when these are planted. So far, they are working great. We have a few tomato and basil plants starting!  Here is the dark opal basil sprout - it's purple!

How To Make Toilet Paper Tube Seed Starters 
 You will need:
Cardboard tubes
Twine or string
Drip tray or plate
Permanent marker
Potting soil or seed starting mix
Water
Seeds

Directions:
1. Collect however many toilet paper tubes you would like to use. You might also be able to cut up paper towel or wrapping paper tubes.
2. Write the name of the seed you are planting on the side of the tube in permanent marker (it will get wet!). Use your twine to tie the tubes together in bunches of 3 or so, with the labeled sides facing out. Arrange the tubes standing up on a drip tray.
3. Fill each tube with moistened potting soil to within 1/2 inch or so of the top.
4. Plant the appropriate seed in each tube. You can use one or two seeds per tube, but you ultimately only want one plant - if two sprout, you'll just pull one.
5. Water the tubes daily (use a spray bottle if you have it).  Keep the soil moist, and soon you will see sprouts starting! Move the seedlings to a sunny windowsill or a grow light.  Continue watering regularly until the plants are the size you want for transplant, or the risk of frost is sufficiently past.

We haven't transplanted these outdoors yet (of course), but I don't think they'll give us any trouble when we do. Make sure you label your plants - I wrote on the tubes, but you can use plant markers if you like. Seedlings are quite hard to tell apart!

Like what you read? Subscribe to the feed in your favorite feed reader, or follow me on Twitter to keep up with new posts!

Thursday, March 29, 2012

Container Gardening: The Costs


Previously, we discussed our seeds and space, and our containers and soil.

So how much is all of this gardening costing us? Of course prices will vary, depending on where you live, but hopefully our experience can help you know what to expect. 

The thing that I didn’t think too much about before we started was how much more it costs to grow things in containers. You must provide every space and all of the soil for the plants, which can add up! Also, because this is our first year gardening, we had to buy nearly everything new. As you will see, we tried to be thrifty where possible, while making a few splurges to get the maximum use out of our space.

EXPENSES:
Shelving unit: $59.99 (Target)
8 large buckets and drip trays: $2.78 per bucket + $0.84 per tray, total $28.96 (Menards)
2 self-watering planters (10 inch): $7.98 (Menards)
4 self-watering planters (8 inch): $8.97 (Menards)
Trough planter: $10.98 (Strader’s)
6” ceramic pot: $4.99 (Strader’s)
We already had a few other small pots that we are using.
2 railing planters: $29.98 (Strader’s)
Seeds: $42.24 (Some from Baker Creek Heirloom Seeds, the rest from Strader’s.)
This was MUCH more than I expected, but we’re growing a lot of different things. The average cost was $1.83 per seed packet. We will be saving seeds from as many of the plants as possible to grow again next year.
Organic potting soil: $58.63 (6 32-quart bags of Miracle Grow Organic Choice – Home Depot)      
2 grow lights: $21.94 (Walmart)
These are for seed starting, probably optional if you have a very sunny windowsill
Odds and ends:
$2.09 for wooden plant labels (Strader’s)
$1.98 for hooks to hang grow lights (Home Depot)
TOTAL INVESTMENT: $278.72 (not including sales tax)

Costs we expect to be one-time: all containers/planters, many seeds, shelving, lights.
Costs we expect to have next year: more soil (although we’ll be looking into re-using some), some seeds, odds and ends.

So our investment this year is pretty substantial, but the cost should diminish significantly in the following years, even if some items must be replaced. I’m sure there will be a few more costs as the season goes on, but these are the big ones.

Our two big splurges were the shelving unit and the railing planters – those set us back about $90 total. But the shelves will let us use a lot of vertical space, and ditto for the railing planters. Since we have such a small area to work with, using vertical space is really important. They are also things that we can re-use in the future.  I think these will be worth the investment.
Comparing this to the CSA I joined last year, the CSA cost a little more than $400, and I got a few pounds of vegetables most weeks of the summer. This garden will cost us a little less than $300, but we don’t know what kind of output we will get. The CSA and garden both carry the risk of crop failure due to any number of causes (although the CSA is in the hands of a professional, not my inexperienced hands). The garden requires more work – I just picked up the CSA once a week. The nice thing about our garden is that we totally control what we plant, and how we grow things, so there is more choice involved. And I’m hoping that growing some of our own food will be very rewarding.

A few things we haven’t spent money on:
1.       Dedicated gardening tools. I’m planning on doing most of the work with my hands, scissors, or a large spoon. This is one of the advantages of container gardening – no back-breaking work to turn up soil!
2.       A watering can or garden hose. The hose was an easy decision – we don’t have an outdoor hook-up for one. I’ll try using an old laundry detergent container (cleaned out well!) as a watering can - it's a pretty simple DIY project. 
3.       Seed starting kits. We are using empty toilet paper rolls (which we’ve been setting aside for a few months now) instead of buying seed starting kits from the store. The cardboard will decompose when we plant the seedlings. 
4.       Fertilizers or pesticides. We’re planning on using a little counter top compost mix to fertilize plants, and I’ll address pest issues as they arise. Some of these natural remedies will be an additional cost, but I don't know which we will need or use yet!

Do you have a garden? How much would you estimate it costs you to keep? 
Like what you read? Subscribe to the feed in your favorite feed reader, or follow me on Twitter to keep up with new posts!

Wednesday, March 28, 2012

Container Gardening: The Plan, Part II

In The Plan, Part I, we talked about the seeds we’d like to grow and the space we have to work with. Want more on gardening? Check out the gardening page!

I planted some wildflower seed paper in our purple ceramic pot, and I'm hoping it will add some color to our garden! The seed paper came from a Whole Foods gift card holder. I've always thought seed paper was really neat, but never planted any until now.

The Containers
5 gallon bucket, 10 inch planter, 8 inch planter, herb trough
Although pretty planters are certainly nice, the more reading and research I did, the more I realized that they weren’t necessary. I knew we could provide good room to grow without investing a ton of cash. Enter pickle buckets (AKA 5 gallon buckets). We picked these green buckets up at Menards for $2.78 each. I'm considering picking up some spray paint to make them more aesthetically appealing.

The problem with the buckets is that they don’t provide any drainage. Fortunately, that’s easily solved with a drill and a drip tray. Nick will be drilling holes in the bottom of each bucket, and they will rest on drip trays so they don’t drip on our downstairs neighbor!  (An aside: because we live in an apartment complex, there’s always the issue of neighbors. I’m hoping to make friends with the nice lady who lives downstairs by sharing some of our produce with her, and by doing everything possible to avoid dripping or dropping things onto her patio!)

These buckets will be used for the tomatoes, beans, squash, peppers, eggplant, and carrots. I will also be companion-planting some herbs in those same buckets. For instance, my reference book says that tomatoes and basil like to grow together, because the basil helps shade the soil and has much shallower roots than the tomato plant (so they don’t compete for nutrients). We will only have one plant of most of these larger plants (because they need the nutrients to themselves), so companion planting lets us get a bit more out of the space.

The smaller plants got lucky when we went shopping for containers. Menards had some self-watering planters that were a good deal. We could have used smaller buckets for these plants too, but the buckets were actually not a better deal in this case, so we went with planters. I don’t know how well the self-watering feature will work, but in any case these should be functional. We have two sizes – 10 inch pots for the larger lettuces (swiss chard, kale), and 8 inch pots for the smaller lettuces and herbs.

We will also be using the ceramic pots we used on the windowsill garden (three six-inch pots and one six-inch strawberry pot). Some may be re-planted; I’m not sure yet.
I mentioned our railing planters above. These are the only two planters like this we’ve located (with a deep pocket for the railing), and they cost $14.99 each. They were definitely a splurge, but hopefully worth it. One of these is going to be all mint.

And finally, one more container: the herb trough. This will be dedicated to our various types of basil.

The Soil

Since we’re gardening in containers, we have to provide soil for the plants. It might seem like the best or thriftiest thing to do would be to take soil from the ground. Putting aside the fact that we don’t have any land to our names, so we’d be stealing the soil from someone, this is a bad plan for a few reasons. First, soil that’s good in the ground isn’t good in containers. Container soil is much lighter in texture and must drain better; soil from the ground will compact and be too hard in containers. Second, we need a very nutrient rich medium for our plants. Potting soil has this built in – the kind we are using contains compost for fertilization.

We’re using an organic potting soil mix (this one) because we want to keep our garden as close to organic growing as possible. We’re not planning to use regular fertilizers or pesticides. We will use a number of natural fertilizers, and deal with pest issues with natural remedies. (Don’t worry, I’ll keep you posted!) There’s no telling how this will work out, but the more organic our garden is, the happier we will all be.

So how much is all of this costing? Later this week, we’ll take a close look at how container gardening is affecting our wallets. 

Like what you read? Subscribe to the feed in your favorite feed reader, or follow me on Twitter to keep up with new posts!

Tuesday, March 27, 2012

Container Gardening: The Plan, Part I


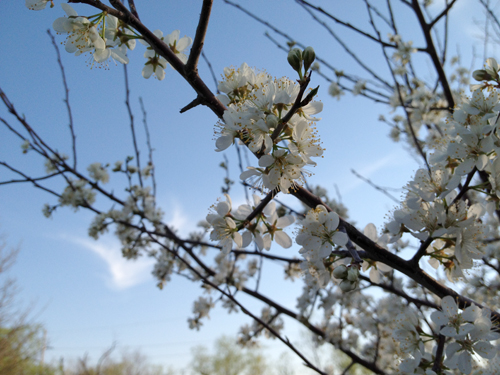
Spring has definitely sprung here in Nebraska. Most of the trees are flowering now, and petals fill the air when the wind gusts. The beautiful change in scenery - vibrant green grass, blossoms all around - has livened up my morning walks with Cooper.

As warmer weather approaches, we’re gathering supplies and getting ready to start some seeds for our container garden. Working with a small space means we have to plan everything very carefully so it will all fit. Here’s what we’re looking at so far.

The Seed List
Seed packets
We will be planting, and attempting to cultivate, all of the following. A few of these have gotten a head start or trial run on our windowsill garden. Most of these specific plants and varieties were selected because they are supposed to perform well in container gardens.

Herbs:
- Basil (sweet Italian, fino verde, cinnamon, lemon, and dark purple opal varieties)
- Dill
- Mint
- Parsley
- Cilantro
- Chives

Lettuces:
- Rainbow Swiss Chard
- Spinach
- Tom Thumb lettuce
- Buttercrunch lettuce
- Blue Curled Scotch Kale

Other vegetables:
- Black Krim tomatoes
- Bush beans (Contender and Royal Burgundy varieties)
- Ronde de Nice zucchini
- Pattypan/Golden Scalloped squash
- Danvers Half-Long carrots
- Nutri-Red carrots
- Little Fingers eggplant
- Red Belgian peppers (sweet)

The Space


That is a LOT of things to try to grow on one tiny deck! The space we plan to use on our deck is 4 feet by 5 feet. (The whole deck is about 13 feet by 5 feet, and houses a grill and a small table.) We’re trying to make the most of the space in a few ways. First, we’re using straight-sided containers for the largest plants (more on that in Part II). Second, we’re using a wire shelving unit to make use of vertical space to grow lettuces and herbs. Third, we invested in a few railing planters to further use all available space. (Most railing planters won’t work on our deck, because it has thin metal rails rather than a thick wooden rail, so it took some searching and splurging to obtain these.)

The other challenge that our deck presents is that it is covered. This means it does not get tons of direct sunlight. In the morning, it gets direct sun from the east, but overhead sun doesn’t happen. This will undoubtedly affect some of the plants more than others, and is part of the reason this year is so experimental. Some plants just might not like living on our deck.  The plants that need the most sun will go along the railing, where they will get the most light, and more shade-tolerant plants will live on other parts of the deck.

Next time, in The Plan, Part II, we’ll discuss containers and soil. 

Like what you read? Subscribe to the feed in your favorite feed reader, or follow me on Twitter to keep up with new posts!

Thursday, March 22, 2012

Windowsill Garden: Lessons Learned

So how did our garden grow? Check out the beginning, February, and March updates. 

Our windowsill gardening experiment lasted a mere three months this winter, but in that time we learned a few things.  Some of our plants grew strong and hearty, and others fizzled.  As amateur gardeners, we didn’t expect everything to work perfectly, but I think experience has taught us a few lessons. 

1. Some plants will thrive, with or without your best efforts.
Our parsley plant is the prime example of this lesson. We abandoned it when it was barely sprouted (we forgot to take it home over Christmas break!), and it survived.  It is thriving now, and I hope that it continues to do well in the future.  I take no credit for its health.  
Our green onions, which I wrote about here, did great in the windowsill and were basically effortless to grow. Again, I don’t feel like this is any sort of spectacular green thumb of mine, but rather a plant doing what plants do. 

2. Some plants will utterly fail, even with your best efforts.
Cilantro
Our chives basically failed to germinate until last week. I think this was because I followed the package directions to sow the seeds on the surface of the dirt, when they need a little cover to keep them wet enough to germinate. We had a similar issue with the tom thumb lettuce.  Those two, however, I think we can chalk up to experience.

Our cilantro is another story. It was one of the first things we planted, with the parsley, but it didn’t survive abandonment. We re-planted, barely got one sprout (about a month later), and that sprout quickly died. We tried again with new seeds, which are germinating decently. It might take us a while to get cilantro growing well for us!

3. If at first you don’t succeed, try again.
See lesson 2 – each time something failed, we tried again. Usually, we adjusted our approach.  Usually, it seems to have helped. We've planted cilantro three times - maybe this time it will stick around.
A corollary to this lesson is that you must be flexible. Things won’t necessarily work as you planned, or as you want them to. Accept that fact, and do the best you can with what you have. 

4. Small space = small yield.  Therefore, herbs are a great choice.
We tried growing some lettuces too, and some micro greens and sprouts.  The micro greens worked alright, but I think we would need to use a much larger container to make them worthwhile in the future. Sprouts were fun, but I didn’t really keep up with them. They were enough to top things with, but we barely grew a salad’s worth altogether. I don’t think we got our money’s worth out of these things, but we might have if I committed to containers with a larger surface area. 
 
Although the parsley was the only herb we really got to take off, it has worked well. Because we only use a few tablespoons at a time, the plant can keep up with our demand quite easily. And financially speaking, fresh herbs can really get expensive at the grocery store, so growing your own can actually save you money. Plus, I find freshly picked herbs are the tastiest.

Mesclun sprouts

5. Keep it simple.
Stick to things you know you will use often, and focus your space and energy on a few plants. You don’t need to grow the whole produce section at the grocery store. I’d also advise not growing things you don’t eat a lot – I don’t eat tons of salads in winter, and I didn’t find many uses for my sprouts other than mixing them into salads. 

Next year, I’m thinking some herbs, and maybe microgreens – but that’s a big maybe. Our windowsill gardening future might be all about the herbs. And that’s fine – it’s simply what we use. 

6. Don’t start in January!
I think windowsill gardening will work much better in the future if we start around, say, October, and the plants get some real sun before toughing it out through the darkest months. If we go into the winter with more mature plants, I think we’ll both have an easier time of it and see a better return. 

There are still some issues that I haven’t figured out.  We had some problems with things growing very “leggy” (long and scraggly), and I think that was partially due to the fact that our windowsill wasn’t super-sunny. With the weak winter sun and short days, the plants simply didn’t get enough light. We added a UV bulb, and that helped quite a bit. But some things, like the tom thumb lettuce, grew very leggy anyways. It’s an issue I’m hoping to read up on so I can address it in the future.

Now that things are warming up, we’re looking forward to starting our outdoor container garden! Next week, I’ll be talking all about our plans for that, including our containers, space, seeds, soil, budget, and progress so far.

Like what you read? Subscribe to the feed in your favorite feed reader, or follow me on Twitter to keep up with new posts! 

Friday, March 16, 2012

Windowsill Garden: March Update

We started our windowsill garden back in January, and I last updated you about a month ago. 

Toward the end of February, we moved everything to a wire shelving unit with some grow bulbs we had set up for seed starting. I suppose this defeats the purpose of a windowsill garden, but I honestly didn’t see a huge difference between growth when we provided a UV bulb on the windowsill, and growth strictly under grow lights.  I've since moved most of the plants back to the windowsill, as the days get longer and the sun gets stronger.

I’m not sure our windowsill is sunny enough for starting plants in winter – with short days and weak sun. In the future, we’ll hopefully be working with some older plants, and we won’t be trying to start young, needy plants during the shortest, coldest days of the year.  If you’re planning to start a windowsill garden, I wouldn’t advise starting in January!

Our spider plant, for example, did great on the windowsill and put off a few more flowering stalks with baby spider plants on the end. So, I think a more mature plant would survive the shortest winter days, even if it didn’t do a ton of growing, but a young plant just can’t quite get moving in the weak sun. 

Here’s how the individual plants are doing:


The parsley is still thriving:
The cilantro and chives have started to germinate. We planted new cilantro seeds (from a new packet), and these ones are looking better than the last. I put a little soil over the chive seeds, and it seems to help germination (the packet said to sow them on top of the soil, which did not work). 
The tom thumb lettuce sprouted after I planted some new seeds, went wild, and I trimmed them back. They grew very scraggly, and I’m not sure what I need to do to get them to grow more compactly. It’s an issue I’ll be working on in our outdoor container garden. It also looks like something might be eating the lettuce leaves (although that might also be decay from sitting in the dirt).
The microgreens and other sprouts continued to do about the same – I harvested some of them, and the rest are doing fine. We’ll be eating the last of these soon; I don’t plan to include sprouts in the outdoor garden.
Our swiss chard is really starting to look good. Although still tiny, it has begun to produce more leaves on a regular basis. The plants are only a few inches tall, probably because of the small pot they are in (a 6 inch pot). I’m considering just transplanting it outside in a larger pot, rather than starting over, but I need to do a bit more research (it might just bolt more quickly).


So what did we learn from this experience? Next week, I’ll talk about our lessons from windowsill gardening. Most importantly, I learned that I don’t have a black thumb, as previously thought – I’m just not sure that I have a green thumb yet either!

Soon, I’m going to focus a lot on our garden plans for the spring and summer. With the super warm weather we’ve been having, I might be starting things outdoors a month sooner than anticipated! I’ll discuss our containers, space, seeds, soil, budget, and progress so far. Look for those posts the week of March 26th

Like what you read? Subscribe to the feed in your favorite feed reader, or follow me on Twitter to keep up with new posts!

ShareThis

Related Posts Plugin for WordPress, Blogger...